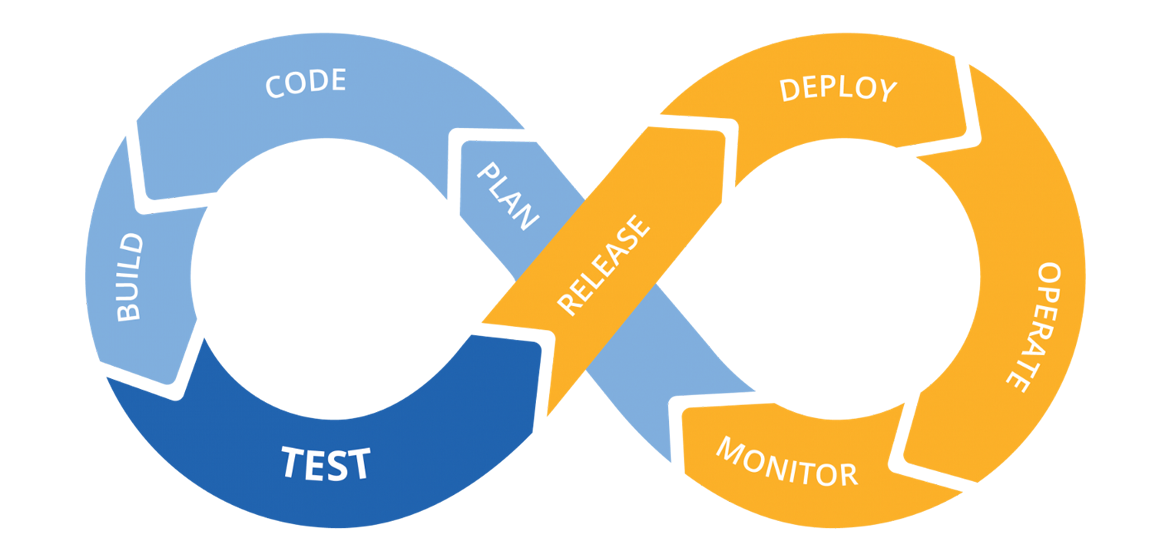
What is CI/CD?
CI: Continuous integration is the practice of automating the integration of code changes from multiple contributors into a single software project. It’s a primary DevOps best practice, allowing developers to frequently merge code changes into a central repository where builds and tests then run. Automated tools are used to assert the new code’s correctness before integration. (source)
CD: Continuous deployment is a strategy for software releases wherein any code commit that passes the automated testing phase is automatically released into the production environment, making changes that are visible to the software's users. (source)
GitHub Actions
GitHub actions allow you to automate your software development and delivery process right from the place you store your code. It lets you Build, Test, and Deploy your applications. It has a generous free-tier that you most likely won't cross. So, it's free and powerful.
GitHub actions can help you automate different phases of software development and delivery. As mentioned above, theres phases usually include Build, Test, and Deploy.
GitHub Actions have 4 main sections:
- Event (such as Push and Pull Requests)
- Job (a series of steps with a shared purpose)
- Steps (phases of a job that need to happen one after another)
- Actions/Command (code or commands that need to be executed in a particular step)
GitHub actions must be inside your repo, under this folder: .github/workflows. Each job runs on a separate machine that GitHub calls a Runner. You can find the list of available runners + the software installed on them here.
GitHub Action to make sure Python code is formatted
Python doesn't have an official formatter, so here we're using a popular one named black (it doesn't matter really. you can choose something else). In this action, we want to maker sure that anyone who makes a Pull Request (PR), has already formatted their code with black. If not, the action will fail and let us know that the PR should not be merged:
# any name you want for the action
name: automation

# which events trigger this action
# here we're saying pull requests to the `main` branch only
on:
  pull_request:
    branches:
      - main

# you can have one or more jobs
jobs:
    # job name
  format:
    # an instance to run the job on
    runs-on: ubuntu-latest
    # steps start here
    steps:
    # this step uses an action from the community to checkout the repo
    # it will download the repo on the instance running the job
      - name: GitHub checkout
        uses: actions/checkout@v2

    # this step runs a command to install `black`
      - name: Install black
        run: pip install black==22.*

    # finally, this step checks to see if all the files
    # are properly formatted
      - name: Run black
        run: black . --check
You can put the above workflow with any name under .github/workflows.
As mentioned above, GitHub Actions can have more than one job in a single workflow. Let's add another one.
GitHub Action to run Python tests
As discussed before, we can use pytest to test our Python code. Let's add another job to the workflow above to do that.
...
  test:
    runs-on: ubuntu-latest
    steps:
      - name: GitHub checkout
        uses: actions/checkout@v2

      - name: Install Pytest
        run: pip install pytest

      - name: Run Tests
        run: python -m pytest
GitHub Action to build and push Docker images to Docker Hub
We can create a GitHub action to build and then push an image into our Docker Hub account:
name: build & push

on:
  push:
    branches:
      - main
    paths-ignore:
      - '**.md'

jobs:
  run:
    runs-on: ubuntu-latest
    env:
      REPO_NAME: <your-repo-name>

    steps:
      - name: GitHub checkout
        uses: actions/checkout@v2

      - name: Docker Build
        run: docker build -t ${{ secrets.DOCKER_HUB_USER }}/${{ env.REPO_NAME }} .

      - name: Docker Push
        run: docker push ${{ secrets.DOCKER_HUB_USER }}/${{ env.REPO_NAME }}:latest
Appendix
YAML
YAML is a human-friendly data serialization language for all programming languages. It is similar to JSON, but unlike JSON, it's more human-readable, more compact, and supports comments. Read more here.
More about YAML:
- YAML files end in
.yamlor.yml - YAML is case-sensitive
- YAML is whitespace-sensitive and indentation defines the structure, but it doesn’t accept tabs for indentation
- Empty lines are ignored
- Comments are preceded by an octothorpe
#
Example of data in YAML:
data:
- name: Alice
  age: 28
  hobbies:
  - Music
  - Programming
- name: John
  age: 25
  hobbies:
  - Running
  - Reading
The JSON equivalent of the above data is as follows:
{
  "data":[
    {
      "name": "Alice",
      "age": 28,
      "hobbies": ["Music", "Programming"]
    },
    {
      "name": "John",
      "age": 25,
      "hobbies": ["Running", "Reading"]
    }
  ]
}
yq
yq A lightweight and portable command-line YAML processor.
Read the documentation on how to download and install yq.
Once you've installed yq, run yq --version in the terminal to make sure everything went fine.
Example
Assuming that you have a file stored in the current directory named test.yaml that contains the following content:
data:
- name: Alice
  age: 28
  hobbies:
  - Music
  - Programming
- name: John
  age: 25
  hobbies:
  - Running
  - Reading
You can run the following commands to query the file:
yq ".data[0].name" test.yamlto getAliceyq ".data[1].name" test.yamlto getJohnyq ".data[1].hobbies[0]" test.yamlto getRunning
You can also use yq to modify a YAML file and generate a new one (it won't replace the original file). For example, the following command will replace the first item in the hobbies array for John to Video Games:
yq ".data[1].hobbies[0] = \"Video Games\"" test.yaml
As mentioned, the output will be a new YAML:
data:
  - name: Alice
    age: 28
    hobbies:
      - Music
      - Programming
  - name: John
    age: 25
    hobbies:
      - Video Games
      - Reading
You can use the > operator in the (Unix) terminal to save the new YAML into a new file. For example, the following command will generate a new YAML and save it into a file named new.yaml:
yq ".data[1].hobbies[0] = \"Video Games\"" test.yaml > new.yaml
DigitalOcean Command Line Interface (doctl)
doctl allows you to interact with the DigitalOcean API via the command line. It supports most functionality found in the control panel.
Read the documentation on how to install and configure doctl for your operating system.
Once doctl is installed and configured, you can interact with DigitalOcean resources via the command line, which comes in handy when using GitHub Actions.
The doctl reference can be found here.
Useful Commands
doctl version: to see the version of the tool and make sure it's installed correctlydoctl auth init: to initiate the authentication processdoctl auth list: to see the list of authenticationsdoctl account get: to get the account informationdoctl apps list: to get the list of appsdoctl apps get <app-id>: to get the details of an appdoctl apps spec get <app-id>: to get the YAML specification of an appdoctl apps update <app-id> --spec spec.yaml: to update the specification of an app
Useful Flags
--wait: to wait for a command to finish--format: to filter the output of a command
CI/CD for Deploying on DigitalOcean
name: ci-cd

on:
  push:
    branches:
      - main

jobs:
  deploy:
    name: build and deploy
    runs-on: ubuntu-latest
    steps:
      - name: Checkout code
        uses: actions/checkout@v3

      - name: Docker build and Push
        run: |
          docker login -u masoudkf -p "${{ secrets.DOCKER_HUB_PASSWORD }}"
          docker build --build-arg STUDENT_NAME="Masoud" --build-arg CHARACTER_IMAGE="character.jpg" --platform linux/amd64 -t masoudkf/click-that-head:$GITHUB_SHA .
          docker push masoudkf/click-that-head:$GITHUB_SHA

      - name: DO Login
        uses: digitalocean/action-doctl@v2
        with:
          token: ${{ secrets.DIGITALOCEAN_ACCESS_TOKEN }}

      - name: DO Deploy
        run: |
          doctl apps spec get ${{ secrets.APP_ID }} > app.yaml
          yq ".services[0].image.tag = \"$GITHUB_SHA\"" app.yaml > app-new.yaml
          doctl apps update ${{ secrets.APP_ID }} --spec app-new.yaml --wait
          MSG="App was deployed.\n$(doctl apps get ${{ secrets.APP_ID }} --format DefaultIngress --no-header true)"
          curl -X POST -H 'Content-type: application/json' --data '{"text":"'"$MSG"'"}' ${{ secrets.SLACK_HOOK }}