This online book contains the lecture notes for the course, Introduction to Software Development.
This course contains an overview of computer programing. By the end of this course, students will have a working knowledge of programming constructs in high-level languages and gain software development skills. The course will provide students with a comprehensive introduction to programming including data engineering, data structures and algorithms, and front-end development.
Instructor: Masoud Karimi Fatemi.
Some commands in this document may not run on Windows machines.
Vesion Control
For every software project, we need a tool to keep our files safe, retain a history of changes, attribute those changes to their authors, and have a seamless collaboration between team members. We also want the tool to be fast and easy to use. Git delivers all that.
Git
A Git project is referred to as a "repository," which contains the complete history of the project from the beginning. A repository consists of individual snapshots called "commits." A single commit includes:
The project tree
A structure of nested files and directories representing a complete state of the project:
project
│   README.md
│   file001.txt
│
└───folder1
│   │   file011.txt
│   │   file012.txt
│   │
│   └───subfolder1
│       │   file111.txt
│       │   file112.txt
│       │   ...
│
└───folder2
    │   file021.txt
    │   file022.txt
The "author"
Name, email address, and date/time indicating who made the changes that resulted in this project state and when.
The "committer"
The same information about the person who added this commit to the repository (which may be different from the author).
Note: author and committer will refer to the same person if you're working on a Git project alone. In group projects, however, they could refer to different people (or even bots!).
A "commit message"
Text used to comment on the changes made by the commit.
The following figure shows a Git project containing one branch (Main) and 4 snapshots (commits).
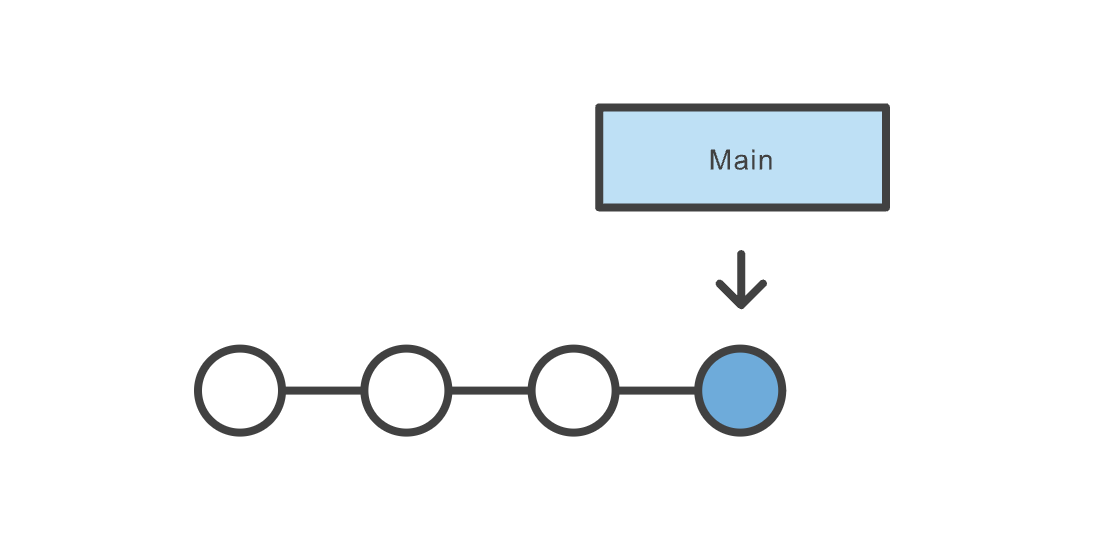
Image Credit: Atlassian
Download and Install Git
First, there's a chance you already have Git installed on your system. To make sure, open up a Terminal (command-line) and try this command:
git --version
If you see a Git version showing up, you can skip this step. If not, refer to this tutorial on how to install Git based on your operating system.
Turning a Folder Into a Git Project
In order to turn a folder into a Git project, first cd to the folder in your Terminal: cd /your/folder. Then run git init. If successful, the folder is now tracked via Git. You should also be able to see a hidden folder named .git in your root directory: ls -la.
Create Snapshots (commits)
In order to create snapshots in a Git project, you need to first stage your changes, as commits only create snapshots of the changes already staged within a project. To stage a file, run git add <file-name>. You can also use the handy git add -A command to stage everything in the project. To create a snapshot of staged files and folders, use the git commit -m "commit message" command. The commit message could be anything, but it's highly recommended to put something meaningful, especially if you're working in a team, as it makes it easier to follow changes later.
Check the Status of a Project
You can use the git status to check the status of a project. Note that you need to be inside the Git project for the command to work. Here's a sample output of the command:
On branch main
Your branch is up to date with 'origin/main'.

Changes not staged for commit:
  (use "git add <file>..." to update what will be committed)
  (use "git restore <file>..." to discard changes in working directory)
        modified:   git-101/README.md

Untracked files:
  (use "git add <file>..." to include in what will be committed)
        git-101/images/

no changes added to commit (use "git add" and/or "git commit -a")
It tells you which branch you are currently on (main in this case); files not staged yet; and files not being tracked at the moment. To stage a file, or start tracking a file, use the git add <file-name> command.
Branches
When you first turn a directory to a Git project, Git will create a branch named main for you (you can list your branches by using the git branch command). Changes you make (almost) always happen on a branch. A branch is simply a pointer to a commit. That commit in turn can point to a parent commit, then another parent commit, etc.

Image Credit: Atlassian
Branches are very important when working in a team. We create branches (or branch off an existing branch, as they say) to work on a new feature, bug fix, etc. while at the same time not interfering with other teammates' works on other branches. When finished, we will merge our branch to a main branch. Note that I said a main branch and not the main branch. In a real-world scenario, typically, there are multiple main branches associated with different environments (for instance: dev, staging, and production). A main branch is a branch that once merged into, will usually trigger a deployment process and change the state of an environment.
In order to create a branch, you can use the git branch <branch-name> command. Note that this will not change the current branch for you. You also need to checkout to the branch using the git checkout <branch-name>. There's also a handy command: git checkout -b <branch-name> which will create the branch and checkout to it in one step.
Remote Repository
Remote repository is a server that holds a central copy of your local repository. A central or remote repository is key to working efficiently in a team, as each team member can pull the latest changes from the central repository and push their changes to it. The following figure shows a central (remote) repository and two collaborators working as a team.

Image Credit: Atlassian
It's convention to name the remote repository origin. To pull the latest changes from the remote repo, use git pull origin <branch-name>, and to push your changes to the remote repo, use git push origin <branch-name>.
Pull Request
A Pull Request (or PR for short) is request to merge your branch (including your latest changes) to a remote branch. Although you may be able to push directly into a branch without creating a PR first, it's always recommended to do so when you're working in a team, as PRs allow collaborators to discuss the changes before merging.
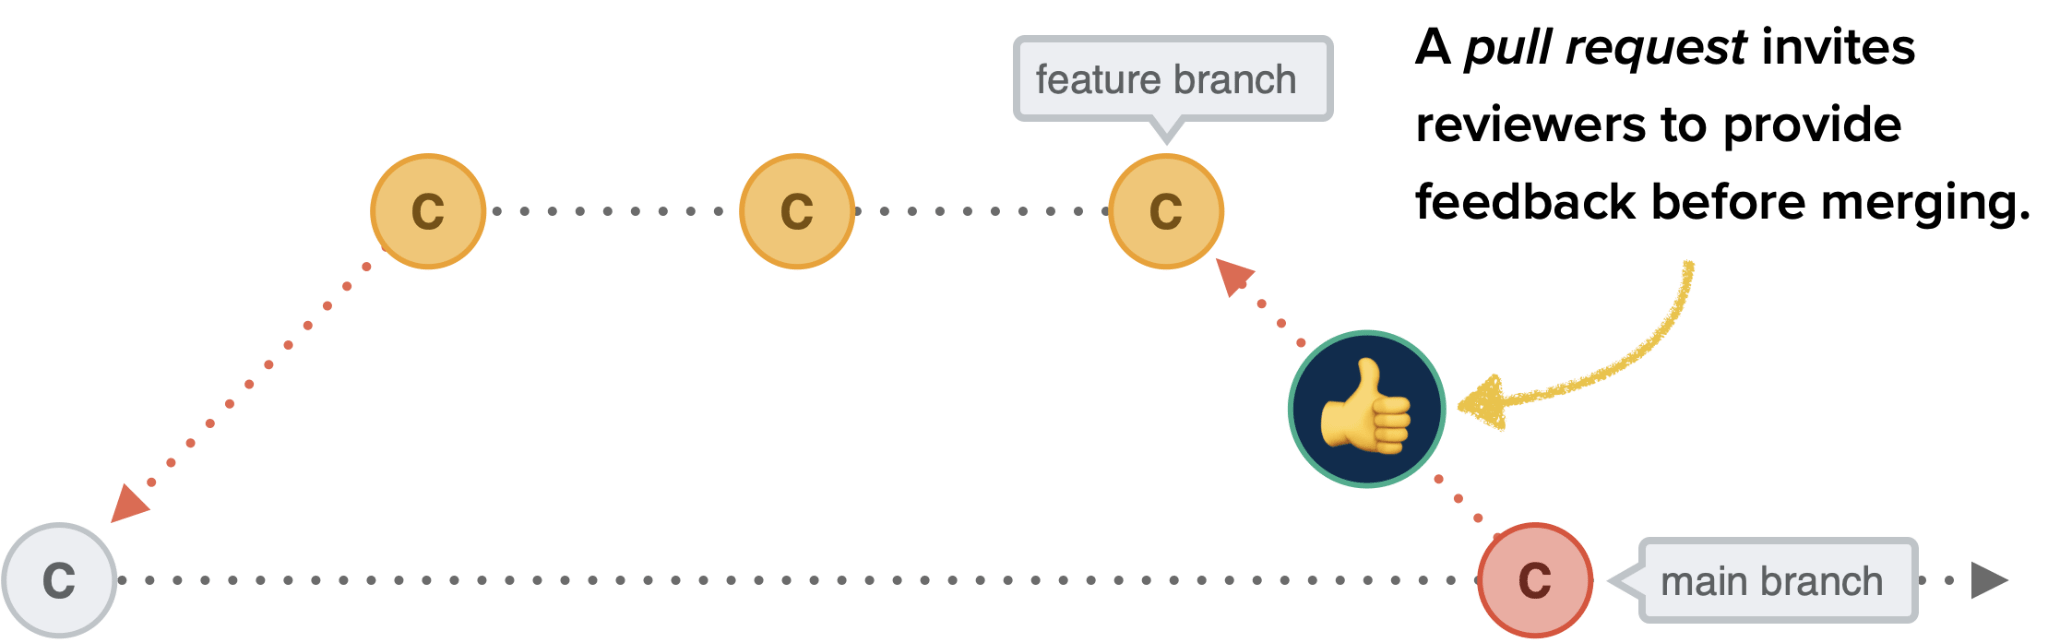
Image Credit: CSS Tricks
Most-used Commands in This Course
# initialize a git repository
git init

# add (stage) all changes
git add -A

# commit staged changes with a message
git commit -m "commit message"

# create a new branch and checkout into it
git checkout -b <branch-name>

# change the current branch to an existing branch
git checkout <branch-name>

# delete a branch
git branch -D <branch-name>

# see commit logs
git log

# see logs in one line
git log --online

# see status of the current local repository
git status

# see the list of local branches
git branch

# see the list of both local and remote branches
git branch -a

# rebase a branch with another one
git rebase <branch-name>

# see remote repositories linked to the current local repository
git remote -v

# add a new origin (remote repository)
git remote add origin <origin-url>

# pull the latest changes from the remote repository
git pull origin <branch-name>

# push a branch to the remote repository
git push origin <branch-name>

# cache GitHub credentials
git config --global credential.helper 'cache --timeout=36000'

# remove git cache
git rm -r --cached .

# set upstream (default remote branch) for a local branch
git push -u origin <branch-name>

# revert a commit
git revert <commit-hash>

# config username and email for a git project
git config user.name "username"
git config user.email "email"
Git cheat sheet
The commands discussed above--and more--are summarized in this cheat sheet available to download.
Programming Fundamentals
Variables, Loops, and Data Structures.
Setting Up Your Programming Environment
- Python
- Editor
Installing Python
Currently, the latest version is Python 3.11, but if you have Python 3.9 above, you're good.
Checking If You Have Python Installed
Open up a terminal and try python --version or python3 --version. If you get a version number 3.9 or above, you already have Python installed on your system. If you get a message like command not found, you need to install Python.
To install Python, go to python.org, click on Download and follow the instructions.
VSCode
We use VSCode in this course which is a free editor available for all the major operating systems (Windows, Mac, Linux). You're free to use any editor you already have and feel comfortable with. To install VSCode, go to code.visualstudio.com/download.
Python Shell
You can run snippets of Python code by opening a new terminal window and typing python or python3 (depending on your setup). You get a message like this:
$ python3
Python 3.10.6 (v3.10.6:9c7b4bd164, Aug  1 2022, 17:13:48) [Clang 13.0.0 (clang-1300.0.29.30)] on darwin
Type "help", "copyright", "credits" or "license" for more information.
>>>
This command starts a Python terminal session. You should see a Python prompt (>>>), which means your operating system has found the version of Python you just installed.
Running VSCode From the Terminal
You can run VSCode from the terminal by typing code after adding it to the path:
- Launch VSCode.
- Open the Command Palette (
Cmd+Shift+PorCtrl+Shift+Pon Windows) and typeshell commandto find the Shell Command:Install 'code' command in PATHcommand. - Restart the terminal for the new Path value to take effect.
- Now, hopefully!, you should be able to use the
codecommand in your terminal to open VSCode.
Your First (amazing) Python Program
Open an empty folder using VSCode and create file ending in .py. Here, we're going to call it hello_world.py. Add the following code to the file:
print("Hello, World!")
Open up the terminal inside your VSCode using the Ctrl+` or Cmd+` shortcut (or click on the Terminal menu and select New Terminal).
Run the code with the following command:
python hello_world.py
You should be able to see this output:
Hello, World!
Variables & Data Types
We'll talk about different kinds of data you can work with in Python programs. We’ll also learn how to use variables to represent data in our programs.
Variables
In a programming language, a variable is like a container that holds information or data. It has a name and a value, and you can change the value as needed while your program runs.
You can add a variable in Python using variable-name = variable-value. Example:
msg = "Hi, there!"
print(msg)
We’ve added a variable named msg. Every variable is connected to a value, which is the information associated with that variable. In this case the value is the "Hi, there!" text.
Run the program and you should see Hi, there! showing up in the terminal.
Variables
Let's expand the program a little more:
msg = "Hi, there!"
print(msg)

msg = "How's it going?"
print(msg)
Now when you run the program, you should see:
Hi, there!
How's it going?
You can change the value of a variable in your program at any time, and Python will always keep track of its current value.
Variable Names
- (Rule): Variable names can contain only letters, numbers, and underscores (
_). They can start with a letter or an underscore, but not with a number. For instance, you can call a variablemessage_1but not1_message. - (Rule): Spaces are not allowed in variable names, but underscores can be used to separate words in variable names. For example,
greeting_messageworks butgreeting messagewill cause errors. - (Rule): Avoid using Python keywords and function names as variable names. For example, do not use the word
printas a variable name; Python has reserved it for a particular programmatic purpose. (We'll see lots of them in this course!). Tip: using a good editor like VSCode helps you identify such issues. - (Best Practice): Variable names should be short but descriptive. For example,
nameis better thann,student_nameis better thans_n, andname_lengthis better thanlength_of_persons_name. In ourhello_world.pyprogram, I named the variablemsg. It would've been better if I'd named itmessage!
On Naming Things
There are only two hard things in Computer Science: cache invalidation and naming things.
-- Phil Karlton
In case you're interested, read Naming Things: The Hardest Problem in Software Engineering by Tom Benner.
Think of Variables As Labels
Think of variables as labels that you can assign to values. You can also say that a variable references a certain value.
Strings
The first data type we'll discuss is a string. A string is a series of characters. Anything inside quotes is considered a string in Python, and you can use single or double quotes around your strings like this:
"This is a string."
'This is also a string.'
This flexibility allows you to use quotes and apostrophes within your strings:
'As master Yoda says, "Do or Do not. There is no try!"'
String Methods
A method is an action that Python can perform on a piece of data. Depending on the type of the data, some methods are available and some are not. Some methods come pre-baked with every installation of Python, and you also have the ability to create your own.
Here are some methods for the string data type that come with the Python standard library:
name = "steve jobs"
print(name.title()) # "Steve Jobs"
print(name.upper()) # "STEVE JOBS"
Every method is followed by a set of parentheses, because methods often need additional information to do their work. That information is provided inside the parentheses. The title() and upper() methods don’t need any additional information, so the parentheses are empty.
Using Variables in Strings
In some situations, you’ll want to use a variable’s value inside a string. For example, you might want to use two variables to represent a first name and a last name, respectively, and then combine those values to display someone’s full name:
first_name = "Sherlock"
last_name = "Holmes"

full_name = f"{first_name} {last_name}"
print(full_name) # "Sherlock Holmes"
These strings are called f-strings. The f is for format, because Python formats the string by replacing the name of any variable in braces with its value.
Adding Whitespace to Strings
In programming, whitespace refers to any nonprinting characters, such as spaces, tabs, and end-of-line symbols. You can use whitespace to organize your output so it’s easier for users to read.
To add a tab to your text, use the character combination \t. To add a newline in a string, use the character combination \n:
print("Python") # Python
print("\tPython") #     Python
print("\tPy\nthon")
#   Py
#thon
You can also combine them together: \n\t.
Stripping Whitespace
Extra whitespace could be confusing to a program. Although we may consider hello and hello to be the same, to a Python program (or any other program in that matter) they are different. (try "hello" == "hello " in a Python shell). To get rid of the extra whitespace in a string, we can use the lstrip(), rstrip(), and strip() methods:
name = " Python    "
print(name.lstrip()) # will print "Python    "
print(name.rstrip()) # will print " Python"
print(name.strip()) # will print "Python"
TRY IT YOURSELF
-
Use a variable to represent a person’s name, and then print that person’s name in lowercase, uppercase, and title case.
-
Find a quote from a famous person you admire. Print the quote and the name of its author. Your output should look something like the following, including the quotation marks:
Masoud Karimi once said, “TED talks are highly overrated.”
-
Repeat the previous exercise, but this time, represent the famous person’s name using a variable called
famous_person. Then compose your message and represent it with a new variable calledmessage. Print your message.
TRY IT YOURSELF
-
Use a variable to represent a person’s name, and include some whitespace characters at the beginning and end of the name. Make sure you use each character combination,
\tand\n, at least once. -
Print the name once, so the whitespace around the name is displayed. Then print the name using each of the three stripping functions,
lstrip(),rstrip(), andstrip().
Numbers
Numbers are used quite often in programming. Python treats numbers in several different ways, depending on how they’re being used.
Integers
Integers are numbers without a decimal point, such as 6 and 110. Python supports Integers and arithmetic operations on them:
>>> 2 + 3
5
>>> 3 * 2
6
Python treats ** as the exponent operator:
>>> 3 ** 2
9
>>> 3 ** 3
27
Floats
Python calls any number with a decimal point a float. This term is used in most programming languages, and it refers to the fact that a decimal point can appear at any position in a number. You can perform arithmetic with floats just as well:
>>> 0.2 + 0.2
0.4
>>> 2 * 0.1
0.2
Sometimes, however, you may get weird results like this:
>>> 0.2 + 0.1
0.30000000000000004
Integers vs Floats
When you divide any two numbers, you'll get a float, even if the result is a whole number, unless you use the integer division operator //:
>>> 9/3
3.0
>>> 9//3
3
>>> 9//4
2
Mixing integers with floats will also get you a float:
>>> 2 + 2.0
4.0
Underscores
You can group digits together to make them more readable using _s. Python ignores _s in numbers, they're just for readability:
print(1_000_000) # prints 1000000
None
In Python, None is a special data type that represents the absence of a value or the lack of a specific object. It is often used to indicate that a variable or a function should have a value, but no actual value has been assigned or returned.
Multiple Assignments
You can assign values to more than one variable using just a single line of code. This can help shorten your programs and make them easier to read:
first_name, last_name = "Ada", "Lovelace"
Best Practice: Do not use this method to initialize more than 3 or 4 variables at once.
Best Practice: Limit your lines in a Python program to ~80 characters long.
Constants
A constant is a variable whose value stays the same throughout the life of a program. Python doesn’t have built-in constant types (unlike some other programming languages like C or Go), but Python programmers use all capital letters to indicate a variable should be treated as a constant and never be changed:
PI = 3.14
GREATEST_MOVIE_OF_ALL_TIME = "Interstellar"
INSTRUCTOR_BIRTHDAY = "09/09"
Comments
Comments allow you to add information about why you do things in a certain way in your program. They are not executed and have no impact on the way the program runs. As far as the machine is concerned, they're not there.
In Python, the hash mark (#) indicates a comment. Anything following a hash mark in your code is ignored by the Python interpreter:
# this is a comment and has no effect on the program execution
print("this is not a comment")

"""
This is
a multiline
comment
"""
Comments
The real purpose of comments is to explain why you did something, when the reason isn’t obvious. You generally should not add comments that say what a piece of code is doing. That should be obvious from reading the code.
-- Max Alexander
Bad comment:
# integer division
result = total_price // number_of_items
Good comment:
# database schema only accepts integers
result = total_price // number_of_items
The Zen of Python
Experienced Python programmers will encourage you to avoid complexity and aim for simplicity whenever possible. The Python community’s philosophy is contained in “The Zen of Python” by Tim Peters.
Try import this in a Python shell to get the full list.
Lists
A list is a collection of items in a particular order. We use lists when we want to store multiple values in one variable and the order of the items also matters.
You can put anything in a Python list. That is, the items don't have to be of the same type.
Best Practice: Because a list usually contains more than one element, it’s a good idea to make the name of your list plural, such as names or movies.
In Python, square brackets ([]) indicate a list, and individual elements in the list are separated by commas:
movies = ["Interstellar", "V for Vendetta", "Django Unchained"]
print(movies) # ['Interstellar', 'V for Vendetta', 'Django Unchained']
Accessing Elements in a List
You can access any element in a list by telling Python the position, or index, of the item desired. The index of the first item in a list is 0 and not 1. This is not MATLAB!
movies = ["Interstellar", "V for Vendetta", "Django Unchained"]
print(movies[0]) # prints 'Interstellar'
print(movies[1]) # prints 'V for Vendetta'
print(movies[3]) # prints ?? Try it yourself

print(movies[-1]) # prints 'Django Unchained' or LAST element of the list
print(movies[-2]) # prints 'V for Vendetta' or SECOND LAST element of the list

print(f"My favourite movie is {movies[0]}.")
Changing Elements in a List
The syntax for modifying an element is similar to the syntax for accessing an element in a list. To change an element, use the name of the list followed by the index of the element you want to change, and then provide the new value you want that item to have:
movies = ["Interstellar", "V for Vendetta", "Django Unchained"]
print(movies[0]) # prints 'Interstellar'

movies[0] = "Lord of the Rings"
print(movies[0]) # prints 'Lord of the Rings'
Adding Elements to a List
You can append or insert new elements (or items) to a list. append will add a new element to the end of a list, whereas insert can add a new element at any index (or position) of a list:
movies = ["Interstellar", "V for Vendetta", "Django Unchained"]
movies.append("The Matrix")
print(movies) # ['Interstellar', 'V for Vendetta', 'Django Unchained', 'The Matrix']

movies.insert(1, "Kill Bill")
# ['Interstellar', 'Kill Bill', 'V for Vendetta', 'Django Unchained', 'The Matrix']
Best Practice: Because insert usually requires shifting, it's slower than append. Use append if either works for you.
Removing Elements from a List
If you know the position of the item you want to remove from a list, you can use the del statement:
students = ['Alice', 'John', 'Mary']

# let's say Alice drops the course
del students[0]
print(students) # ['John', 'Mary']
Gotcha: When you use del, you lose the element you deleted from the list, which may not be what you wanted!
Removing Elements from a List (more gracefully)
Sometimes you’ll want to use the value of an item after you remove it from a list. For example, you want to remove a student from the class list when they drop the course, but you also want to give them their class fee back and send them a confirmation email afterward:
students = ['Alice', 'John', 'Mary']

# let's say Alice drops the course
dropped_student =  students.pop(0)
print(students) # still prints out ['John', 'Mary']

refund_student(dropped_student)
send_confirmation(dropped_student)
pop() without any arguments will remove the last element of the list.
Removing Based on Value
You can remove the first occurance of a value from a list using the remove() method:
students = ['Alice', 'John', 'Mary']

# let's say Alice drops the course
students.remove('Alice')
print(students) # ['John', 'Mary']
TRY IT YOURSELF
- Try removing a non-existing element from a list. What do you think would happen?
students = ['Alice', 'John', 'Mary']
students.remove('Steve')
Sorting a List
You can sort a list using both sort() and sorted() methods.
Sorting a List
sort() changes the original list, whereas sorted() leaves it untouched (unless you want to change that).
grades = [12, 20, 35, 8, 120]
grades.sort()
print(grades) # [8, 12, 20, 35, 120]

# now with sorted
grades = [12, 20, 35, 8, 120]
sorted(grades)
print(grades) # [12, 20, 35, 8, 120]

grades = sorted(grades)
print(grades) # [8, 12, 20, 35, 120]
Sorting a List
You can use reverse=True argument in both sort() and sorted() to change the order of sorting.
grades = [12, 20, 35, 8, 120]
grades.sort(reverse=True)
print(grades) # [120, 35, 20, 12, 8]

grades = sorted(grades, reverse=True)
print(grades) # [120, 35, 20, 12, 8]
Reversing a List
You can use the reverse() method to reverse a list. Note that reverse() doesn't perform any sorting; it simply reverses the order of the list (and changes the original list!).
movies = ["Interstellar", "V for Vendetta", "Django Unchained"]
movies.reverse()
print(movies) # ['Django Unchained', 'V for Vendetta', 'Interstellar']
Finding the Length of a List
You can quickly find the length of a list by using the len() function.
movies = ["Interstellar", "V for Vendetta", "Django Unchained"]
print(len(movies)) # 3
TRY IT YOURSELF
Think of at least five places in Calgary you’d like to visit.
- Store the locations in a list. Make sure the list is not in alphabetical order.
- Print your list in its original order. Don’t worry about printing the list neatly; just print it as a raw Python list.
- Use
sorted()to print your list in alphabetical order without modifying the actual list. - Show that your list is still in its original order by printing it.
- Use
sorted()to print your list in reverse-alphabetical order without changing the order of the original list. - Show that your list is still in its original order by printing it again.
- Use
reverse()to change the order of your list. Print the list to show that its order has changed. - Use
reverse()to change the order of your list again. Print the list to show it’s back to its original order. - Use
sort()to change your list so it’s stored in alphabetical order. Print the list to show that its order has been changed. - Use
sort()to change your list so it’s stored in reverse-alphabetical order. Print the list to show that its order has changed.
Looping Through a List
You often need to run through all elements in a list and perform a the same task on all of them, such as sending an email to every person in a list. You can use Python’s for loop to do that.
movies = ["Interstellar", "V for Vendetta", "Django Unchained"]
for movie in movies:
    print(movie)
The output will be:
Interstellar
V for Vendetta
Django Unchained
What's movie in the above code?
Looping Through a List
You can do more stuff inside a loop:
movies = ["Interstellar", "V for Vendetta", "Django Unchained"]
for movie in movies:
    print(f"The movie name is {movie}")
    print(f"I like to see {movie}")
print("This line will only run once and not per element in the list")
Every indented line following the line for movie in movies is considered inside the loop, and each indented line is executed once for each value in the list. Any lines of code after the for loop that are not indented are executed once without repetition.
Indentation in Python
Python uses indentation to determine how a line, or group of lines, is related to the rest of the program. In the previous examples, the lines that printed messages to individual movies were part of the for loop because they were indented. Python’s use of indentation makes code very easy to read.
Indentation Errors
Always indent the line after the for statement in a loop.
movies = ["Interstellar", "V for Vendetta", "Django Unchained"]
for movie in movies:
print(f"The movie name is {movie}")
Indentation Errors
Remember to indent all lines that belong to a code block (such as a for loop).
movies = ["Interstellar", "V for Vendetta", "Django Unchained"]
for movie in movies:
    print(f"The movie name is {movie}")
print(f"I like to see {movie}")
What's the output of the above code?
Indentation Errors
Unnecessary indentation:
message = "Hello!"
    print(message)
TRY IT YOURSELF
- Store a few topics you'll learn in this course (SSD 101) in a list (such as Git, Programming Fundamentals, Testing, and Algorithms). Write a Python program that runs through the list and for each item prints
I'm going to learn <topic> in SSD 101.
The range() function
Python’s range() function makes it easy to generate a series of numbers.
for number in range(1, 5):
    print(number)
Output:
1
2
3
4
The first number in range() is inclusive, but the second one exclusive! The first argument is optional. If not specified, range() will start from 0. You can also pass a third argument as a step. Try replacing range(1, 4) with range(1, 4, 2) in the above example.
Make a List of Numbers with range()
You can make a list from the results of range() using the list() function:
even_numbers = list(range(1, 6, 2))
print(even_numbers) # [1, 3, 5]
TRY IT YOURSELF
- Write a Python program that computes the square of numbers from
0to20, adds them to a list, and prints the list at the end.
Hint:
squares = []
for number in range(0, 21):
    # ...
Fun Methods with a List of Numbers
There are a few Python methods that may come in handy when you're working on a list of numbers:
sales = [120, 45, 67, 350, 599, 1210]
print(min(sales)) # 45
print(max(sales)) # 1210
print(sum(sales)) # 2391
Working with Part of a List
Instead of working with a whole list, you can also work with a specific group of items in a list, called a slice in Python.
To make a slice, you specify the index of the first and last elements you want to work with. As with the range() function, Python stops one item before the second index you specify.
movies = ["Interstellar", "V for Vendetta", "Django Unchained", "Kill Bill"]
print(movies[0:2]) # ['Interstellar', 'V for Vendetta']
print(movies[2:4]) # ['Django Unchained', 'Kill Bill']
print(movies[1:]) # ['V for Vendetta', 'Django Unchained', 'Kill Bill']
print(movies[:3]) # ['Interstellar', 'V for Vendetta', 'Django Unchained']
print(movies[-2:]) # ??
Looping Through a Slice
You can loop through a slice as you would with a whole list:
movies = ["Interstellar", "V for Vendetta", "Django Unchained", "Kill Bill"]
for movie in movies[:2]:
    print(movie)
Tuples
Tuples are like Python lists except that they cannot be changed later. We can't add, remove, or change their items. This is useful if you want to have a list whose items must not change during the program. Use () instead of [] to create a tuple.
movies = ["Interstellar", "V for Vendetta", "Django Unchained"]
print(movies[0]) # Interstellar
movies[0] = "Kill Bill" # this is fine

movies = ("Interstellar", "V for Vendetta", "Django Unchained")
print(movies[0]) # Interstellar
movies[0] = "Kill Bill" # this is NOT fine!
Gotcha: Tuples are technically defined by the presence of a comma. In order to create a tuple with one element, you need to do this:
movies = ("Interstellar", )
Looping Through a Tuple
You can loop through a tuple just like you would for a list:
movies = ("Interstellar", "V for Vendetta", "Django Unchained")
for movie in movies:
    print(movie)

# slicing a tuple
for movie in movies(1:):
    print(movie)
TRY IT YOURSELF
- What happens if you try to reassign a new tuple to a variable that's already pointing to a tuple?
movies = ("Interstellar", "V for Vendetta", "Django Unchained")
movies = ("Kill Bill",)
Dictionaries
Another complex data type in Python is the Python dictionary. A dictionary is a collection of key-value pairs. Each key is connected to a value, and you can use a key to access the value associated with that key (unlike lists where you use an index). A key's value could be any type you can create in Python, such as strings, numbers, lists, dictionaries, etc.
In Python, a dictionary is wrapped in braces ({}) with a series of key-value pairs inside them.
ssd101_subjects = {
    "chapter_1": "Git",
    "chapter_2": "Programming Fundamentals",
    "chapter_3": "Testing"
}
print(ssd101_subjects)
# {'chapter_1': 'Git', 'chapter_2': 'Programming Fundamentals', 'chapter_3': 'Testing'}
You can have an unlimited number of key-value pairs in a dictionary!
Accessing Values in a Dictionary
To get the value associated with a key, give the name of the dictionary and then place the key inside a set of square brackets:
ssd101_subjects = {
    "chapter_1": "Git",
    "chapter_2": "Programming Fundamentals",
    "chapter_3": "Testing"
}

first_chapter = ssd101_subjects["chapter_1"]
print(f"First, we're going to learn about {first_chapter}. Yoohoooo!!")
TRY IT YOURSELF
- Try accessing a key that doesn't exist in a dictionary. What do you think would happen?
ssd101_subjects = {
    "chapter_1": "Git",
    "chapter_2": "Programming Fundamentals",
    "chapter_3": "Testing"
}

print(ssd101_subjects["chapter_4"])
Using get() to Access Values
Using keys in square brackets ([]) to retrieve the value you’re interested in from a dictionary might cause one potential problem: if the key you ask for doesn’t exist, you’ll get an error.
get() method to the rescue! The get() method requires a key as a first argument. As a second optional argument, you can pass the value to be returned if the key doesn’t exist. No more errors!
ssd101_subjects = {
    "chapter_1": "Git",
    "chapter_2": "Programming Fundamentals",
    "chapter_3": "Testing"
}

print(ssd101_subjects.get("chapter_4")) # prints None, but no error
print(ssd101_subjects.get("chapter_4", "TBD")) # prints 'TBD'
Adding New Key-Value Pairs
Dictionaries are dynamic structures, and you can add new key-value pairs to a dictionary at any time.
ssd101_subjects = {
    "chapter_1": "Git",
    "chapter_2": "Programming Fundamentals",
    "chapter_3": "Testing"
}

ssd101_subjects["chapter_4"] = "Algorithms & Data Structure"
Good to know: In Python, dictionaries retain the order of keys in which they were defined. (this is a big deal actually!)
An Empty Dictionary
You can start with an empty dictionary and add items as you go furthur in your program. Sometimes this is necessary as you don't know in advance what you'll have in your dictionary. e.g. when you're getting information from an external source.
movie_ratings = {}
movie_ratings["Interstellar"] = 10
movie_ratings["V for Vendetta"] = 9.8
movie_ratings["Lord of the Rings"] = 9.5
print(movie_ratings)
# {'Interstellar': 10, 'V for Vendetta': 9.8, 'Lord of the Rings': 9.5}
Changing an Existing Value in a Dictionary
We can change the value of a key at any time using the key and a new value:
movie_ratings = {}
movie_ratings["Interstellar"] = 10
print(f"IMDB rating of 'Interstellar' is {movie_ratings['Interstellar']}")

movie_ratings["Interstellar"] = 9.8
print(f"IMDB rating of 'Interstellar' is now {movie_ratings['Interstellar']}")
Removing Key-Value Pairs
You can remove a key-value pair using the del statement, like you would with a Python list. del needs the name of the dictionary and the key you want to delete.
movie_ratings = {}
movie_ratings["Interstellar"] = 10
movie_ratings["V for Vendetta"] = 9.8

del movie_ratings["Interstellar"]
print(movie_ratings) # {'V for Vendetta': 9.8}
Looping Through a Dictionary (method 1)
You can run through all key-value pair in a dictionary using the items() method:
movie_ratings = {}
movie_ratings["Interstellar"] = 10
movie_ratings["V for Vendetta"] = 9.8
movie_ratings["Lord of the Rings"] = 9.5

for movie, rating in movie_ratings.items():
    print(f"Movie {movie} has the rating: {rating}.")

# Movie Interstellar has the rating: 10.
# Movie V for Vendetta has the rating: 9.8.
# Movie Lord of the Rings has the rating: 9.5.
Looping Through a Dictionary (method 2)
You can choose to only loop through the keys in a dictionary using the keys() method:
movie_ratings = {}
movie_ratings["Interstellar"] = 10
movie_ratings["V for Vendetta"] = 9.8
movie_ratings["Lord of the Rings"] = 9.5

for movie in movie_ratings.keys():
    print(f"Movie {movie} exists in the dictionary.")

# Movie Interstellar exists in the dictionary.
# Movie V for Vendetta exists in the dictionary.
# Movie Lord of the Rings exists in the dictionary.
Looping Through a Dictionary (still method 2)
Because the keys() method returns a list, you can perform an action on the list of keys in a dictionary before running through them. For example, we can sort the keys alphabetically first:
movie_ratings = {}
movie_ratings["Interstellar"] = 10
movie_ratings["V for Vendetta"] = 9.8
movie_ratings["Lord of the Rings"] = 9.5

for movie in sorted(movie_ratings.keys()):
    print(f"Movie {movie} exists in the dictionary.")

# Movie Interstellar exists in the dictionary.
# Movie Lord of the Rings exists in the dictionary.
# Movie V for Vendetta exists in the dictionary.
Looping Through a Dictionary (method 3)
If you are mainly interested in the values that a dictionary contains, you can use the values() method to return a sequence of values without any keys:
movie_ratings = {}
movie_ratings["Interstellar"] = 10
movie_ratings["V for Vendetta"] = 9
movie_ratings["Lord of the Rings"] = 8

all_ratings = movie_ratings.values()
print(f"Average rating: {sum(all_ratings) / len(all_ratings)}") # Average rating: 9.0
TRY IT YOURSELF
- Write a Python program that stores the provinces of Canada and their capitals in a dictionary. Run through the dictionary and print out each province with its capital on a separate line.
Nesting
Sometimes you’ll want to store multiple dictionaries in a list, or a list of items as a value in a dictionary. This is called nesting. You can nest dictionaries inside a list, a list of items inside a dictionary, or even a dictionary inside another dictionary.
A List of Dictionaries
person_1 = {"name": "Alice", "major": "Software Engineering"}
person_2 = {"name": "John", "major": "Electrical Engineering"}
person_3 = {"name": "Mary", "major": "Mechanical Engineering"}

people = [person_1, person_2, person_3]

for person in people:
    print(f"{person['name']} is taking {person['major']} at U of C.")

# Alice is taking Software Engineering at U of C.
# John is taking Electrical Engineering at U of C.
# Mary is taking Mechanical Engineering at U of C.
A List in a Dictionary
person_1 = {"name": "Alice", "major": "Software ", "grades": ["A", "B+", "A+"]}
print(person_1["grades"]) # ['A', 'B+', 'A+']

person_1 = {"name": "Alice", "major": "Software Engineering", "grades": ["A", "B+", "A+"]}
person_2 = {"name": "John", "major": "Electrical Engineering", "grades": ["A+", "B-", "B+"]}
people = [person_1]
people.append(person_2)

for person in people:
    print(f"Grades for {person['name']}: {person['grades']}.")
# Grades for Alice: ['A', 'B+', 'A+'].
# Grades for John: ['A+', 'B-', 'B+'].
A Dictionary in a Dictionary
students = {
    "Alice": {
        "major": "Software Engineering",
        "grades": ["A", "B+", "A+"]
    },
    "John": {
        "major": "Electrical Engineering",
        "grades": ["A+", "B-", "B+"]
    }
}

for student_name, student_info in students.items():
    print(f"Student {student_name} is taking {student_info['major']} with grades: {student_info['grades']}.")

# Student Alice is taking Software Engineering with grades: ['A', 'B+', 'A+'].
# Student John is taking Electrical Engineering with grades: ['A+', 'B-', 'B+'].
TRY IT YOURSELF
- Create a phone book in Python using a dictionary. Use names as the keys and a dictionary of information (such as phone number, address, and email) as the value for each person. That is, you should be able to look up
Alicein the dictionary and get her phone number, address and email. If the person you're looking for has not yet added to the phone book, the program should showNoneas their info.
Programming Fundamentals (cont.)
Conditionals, Functions, Files, Exceptions, and working with Structured Data.
if Statements
Oftentimes in your program you want to decide which action to take based on a condition (e.g. is my list empty? is the temperature over a certain value? did I successfully connect to the database?). Python's if statements help you with that.
A Simple if Statement
cities = ["Toronto", "Vancouver", "Calgary", "Montreal"]

for city in cities:
    if city == "Calgary":
        print(f"{city} is the best city in Canada!")
    else:
        print(f"{city} is just meh!")
What's happening here?
Conditional Test
At the heart of every if statement is an expression that can be evaluated as True or False and is called a conditional test.
If a conditional test evaluates to True, Python runs the code inside the if block, and if the test evaluates to False, Python ignores it.
In the previous example, we used the equality operator (==) which returns either True or False (don't confuse it with the assignment operator =).
Good to know: Python Shell is a great tool to play around with conditional tests.
TRY IT YOURSELF
-
Open up a Python shell and try the following statements:
city = "Calgary"
city == "Calgary"
university = "UCalgary" university == "ucalgary" university == "Ucalgary" university == "UCalgary" university.lower() == "ucalgary"
Inequality Operator (!=)
There are times you want to check for inequality instead of equality. For example, if the destination country is not Canada, then we can't ship there:
destination_country = "Italy"

if destination_country != "Canada":
    print("Sorry, but we don't ship there")
Mathematical Comparisons
Another group of statements that can be evaluated to True or False are mathematical comparisons.
>>> age = 19
>>> age < 21
True
>>> age <= 21
True
>>> age > 21
False
>>> age >= 21
False
What happens if you do this?
>>> 50 > "Calgary"
>>> 50 == "Calgary"
Checking Multiple Conditions
You can use the and or the or keyword to create more complex conditional tests.
and
For and, the whole conditional test will evaluate to True only if ALL the single tests evaluate to True.
>>> age = 28
>>> name = "Alice"
>>> age == 28 and name == "Alice"
True
>>> age == 29 and name == "Alice"
False
>>> age == 28 and name == "alice"
False
>>> job = "student"
>>> age == 28 and name == "Alice" and job == "student"
True
You can use optional parantheses to improve readability:
(age == 28) and (name == "Alice")
or
With or, the conditional test evaluates to True when at least ONE conditional test evaluates to True; otherwise, it will evaluate to False.
>>> age = 28
>>> name = "Alice"
>>> age == 28 or name == "Alice"
True
>>> age == 29 or name == "Alice"
True
>>> (age == 28) or (name == "alice")
True
>>> (age == 29) or (name == "alice")
False
Boolean Expressions
A Boolean expression is just another name for a conditional test. A Boolean value is either True or False, just like the value of a conditional expression after it has been evaluated.
Boolean values are often used to keep track of certain conditions, such as if a user is authorized to click a button, or if getting data from the database has finished:
user_authorized = False
data_gathering_finished = True
You can then use boolean values in if statements:
if user_authorized:
    # do something here
if data_gathering_finished:
    # do something here
Naming Best Practice for Booleans
When it comes to naming variables of type bool, it's convention to start their name with is_:
is_user_authorized = True
is_data_gathering_finished = False
if Statements (cont'd)
An if statement contains a conditional test (simple or complex) that can be evaluated to True of False.
if statements, like for loops, create a new indented block. The block can have one or more Python statements:
if age > 28:
    print("...")
    print("...")
    print("...")
if-else Statements
Sometimes, you want to take one or a series of actions when a conditions passes, and another set of actions when it doesn't. In this case, you can use an if-else statement:
age = 17
if age >= 18:
    print("You can get a driver's license")
else:
    print("You can't get a driver's license")
The if-elif-else Stetements
Sometimes, you need to test more than two possible situations. In this case you can use the Python if-elif-else syntax. Python executes only one block in an if-elif-else chain. Once a test condition passes, Python executes the block following that condition, and skips the rest:
age = 28
if age < 4:
    print("You get a kid discount")
elif age < 60:
    print("You get a normal adult fair")
else:
    print("You get a senior discount")
Multiple elif Blocks
You can have as many elif blocks as you want:
age = 45
if age < 4:
    print("You get a kid discount")
elif age < 39:
    print("You get a normal adult fair")
elif age < 65:
    print("You get an adult experiencing midlife crisis discount")
else:
    print("You get a senior discount")
Can you omit the else statement at the end?
Multiple if Statements
Sometimes, you want to check all the possible situations where more than one can be evaluated to True instead of just one. In this case, the if-elif-else statement doesn't help. But you can have multiple if statements one after another. Python checks every single one of them even if a previous if statement met the condition:
tax_credits = ["charity", "work-from-home", "self-employed"]

if "charity" in tax_credits:
    print("You get a Charitable Donation Tax Credit.")

if "work-from-home" in tax_credits:
    print("You get a Work from Home Tax Credit.")

if "self-employed" in tax_credits:
    print("You get Self-employment Expenses Tax Credit.")
What happens if you change the last 2 if with elif?
if and Lists
We'll check a few ways you can use if statements where the conditional test is related to a Python list.
Looking for a Value in a List
You can use the in keyword to see if a particular value is in a list. In case the value is indeed in the list, the conditional test will evaluate to True, otherwise, it will be False.
cities = ["Toronto", "Vancouver", "Calgary", "Montreal"]

if "Calgary" in cities:
    print("Now that's a good list!")
else:
    print("This list stinks!")
You can use not in to check if a value is not in a list:
if "Calgary" not in cities:
Check if a List is Empty
Python evaluates an empty list to False and a list with an item or more to True.
cities_to_visit = []
if cities_to_visit:
    for city in cities_to_visit:
        print(f"Let's go visit {city}!")
else:
    print("The list of cities to visits is empty. Let's staty home and eat pizza instead.")
Best Practices
Python evaluates certain values as False when in a boolean context. A quick "rule of thumb" is that all "empty" values are considered False: 0, None, [], {}, ''.
Use the "implicit" False or True if possible. They're easier to read and in most cases, they're also faster!
my_list = []

# good
if not my_list:
    print("list is empty")

# bad
if len(my_list) == 0:
    print("list is empty")
if my_list == []:
    print("list is empty")
Best Practices
Although None evaluates to False, distinguish between the two as they're different in nature. None means an absence of a value, whereas False is a value:
a = None
b = []

# in order to check for None, use "is None" or "is not None"
if a is None:
    print("...")

# in order to check for empty/non-empty, use the implicit False value
if b:
    print("...")
This will make more sense when we talk about Python functions.
Functions
Functions are named blocks of code to do one specific job. When you want to perform a particular task that you've defined in a function, you call the function responsible for it. If you need to perform that task multiple times throughout your program, you don’t need to type all the code for the same task again and again; you just call the function dedicated to handling that task, and the call tells Python to run the code inside the function. You’ll see that using functions makes your programs easier to write, read, test, and fix.
You're also able to pass information to functions to change their behaviour. e.g. a function that adds a new record in a database table may get the record from the code calling it (the caller).
Defining a Function
# defining a function
def say_cheese():
    """Displays 'Cheese!'"""
    print("Cheese!")

# calling a function
say_cheese()
The def keyword tells Python that you're defining a function. This is what we call the function definition which tells Python:
- the name of the function
- what kind of information the function needs to do its job (the
()holds that information)
All the indented lines that follow def say_cheese(): make up the body of the function.
The first line in the body of the function is called a docstring which is the function documentation. Python can use this docstring to generate documentation for the function (try say_cheese.__doc__).
TRY IT YOURSELF
Explain the following:
- Function definition
- Function body
- Docstring
- Function call
- Function caller
Passing Info to a Function
Currently, the say_cheese() function only does one thing: saying 'Cheese!'. It's more common to have a function that does more than saying the same thing over and over. For instance, let's say we want a function that can say ANYTHING we want it to say. How can we do that?
def say_anything(thing):
    print(thing)
Here, we add thing to the function definition, which is a placeholder (or a variable) that can accept any value from the caller. We can now call the function and pass additional information:
say_anything("Ice cream so good.") # Ice cream so good.
Functions can accept more that one parameter.
Arguments vs Parameters
In the previous example, the variable thing in the definition of say_anything() is an example of a parameter, a piece of info that the function needs to perform it's job.
The value Ice cream so good. in say_anything("Ice cream so good.") is an example of an argument, a piece of info that's passed from a caller to a function.
Poeple use these terms interchangeably!
TRY IT YOURSELF
- Write a function that accepts a social network name as a parameter named,
social_network_name. The function should print that using the social network is a waste of time. Example:Using TikTok is a waste of time.Call the function 5-6 times with different social network names.
Passing Arguments
There are different ways to pass an argument to a function, which we'll be exploring next.
Positional Arguments
When you call a function, Python must match each argument in the function call with a parameter in the function definition. The simplest way to do this is based on the order of the arguments provided. Values matched up this way are called positional arguments:
def add_user(first_name, last_name):
    print(f"Adding {first_name} {last_name}")

add_user("Jiminy", "Cricket") # Adding Jiminy Cricket
add_user("Cricket", "Jiminy") # Adding Cricket Jiminy
Order matters in positional arguments.
Keyword Arguments
A keyword argument is a name-value pair that you pass to a function. You directly associate the name and the value within the argument, so when you pass the argument to the function, there's no confusion (you won't end up with Cricket Jiminy). In other words, you don't need to worry about correctly ordering the arguments in a function call this way:
def add_user(first_name, last_name):
    print(f"Adding {first_name} {last_name}")

add_user(last_name="Cricket", first_name="Jiminy") # Adding Jiminy Cricket
Order doesn't matter here anymore. Just make sure to use the exact names of the parameters in the function definition.
Default Values
You can define a default value for each parameter in a function definition. If an argument for a particular parameter is provided in the function call, Python will use the argument value, otherwise, it will use the parameter's default value.
def add_user(first_name, last_name="Smith"):
    print(f"Adding {first_name} {last_name}.")

add_user("John") # Adding John Smith.
add_user("John", "Green") # Adding John Green.
What happens if we define a default value for the first parameter?
def add_user(first_name="John", last_name):
Default Values Gotcha
When you use default values, any parameter with a default value needs to be listed after all the parameters that don't have default values. This allows Python to continue interpreting positional arguments correctly.
Put yourself in Python's shoes. What would you do in this situation?
def add_user(first_name="John", last_name):
    print(f"Adding {first_name} {last_name}.")

add_user("Alice") # Ambiguous!
Optional Arguments
We can use default values to make an argument optional.
def add_user(first_name, last_name, middle_name=''):
    if middle_name:
        print(f"Added {first_name} {middle_name} {last_name}.")

    else:
        print(f"Added {first_name} {last_name}.")

add_user("Chandler", "Bing")
add_user("Chandler", "Bing", "Muriel")
Argument Errors
When you provide fewer or more arguments than a function needs, Python will yell at you.
Try the following:
def add_user(first_name, last_name):
    print(f"Adding {first_name} {last_name}.")

add_user()
add_user("Chandler")
add_user("Chandler", "Muriel", "Bing")
Passing Arbitrary Number of Arguments
Sometimes, you're not clear on how many arguments will be sent to your function. Python allows a function to accept an arbitrary number of arguments from the caller.
def get_min(*numbers):
    return min(numbers)

min_number = get_min(-10, -12)
print(min_number) # -12

min_number = get_min(1, 10, -20, 56)
print(min_number) # -20
What is the type of numbers? Hint: use print(type(numbers)) inside the function.
Mixing Positional & Arbitrary Arguments
You can mix different types of arguments in Python. For instance:
def student_card(name, *grades):
    print(f"Student {name} has gotten these grades so far: {grades}")

student_card("John Nash", "A", "A+", "B", "C+")
Arbitrary Keyword Arguments
A function can also accept an arbitrary number of keyword arguments. Remember that keyword arguments are key-value pairs used in the caller when calling a function.
def create_profile(first, last, **user_info):
    user_info["first"] = first
    user_info["last"] = last
    return user_info

user_profile = create_profile("Daenerys", "Targaryen",
title_1="Mother of Dragons",
title_2="Breaker of Chains")
print(user_profile)
What's the type of user_info?
TRY IT YOURSELF
What happens when you run the following code?
def create_profile(first, last, **user_info):
    user_info["first"] = first
    user_info["last"] = last
    return user_info

user_profile = create_profile("Daenerys", "Targaryen",
"Mother of Dragons",
"Breaker of Chains")
print(user_profile)
Return Values
A function can take a value from inside a function and return it to the caller. Return values allow you to move much of your program’s grunt work into functions, which can simplify the body of your program.
Job Interview Worthy: In some languages like SQL, the difference between a function and a similar construct (like procedure) is that a function always returns a value.
Return a Simple Value
Let's change our add_user() function to return a value instead of printing to the output:
def add_user(first_name, last_name):
    """Returns a message about adding the user"""
    return f"Added {first_name} {last_name}."

message = add_user("Chandler", "Bing")
print(message) # Added Chandler Bing.
Return a Complex Value
You can also return a complex value, like a list, dictionary, set, or tuple.
def create_person(first_name, last_name, middle_name=""):
    """Returns a dictionary of data related to the person"""
    person = {}
    person["first_name"] = first_name
    person["last_name"] = last_name
    if middle_name:
        person["middle_name"] = middle_name

    return person

person = create_person("Ross", "Geller")
print(person)
# {'first_name': 'Ross', 'last_name': 'Geller'}
Return Multiple Values
A function can return more than one values. To return return more than one values, separate them using ,s in the return statement.
To store the multiple return values, use the multiple assignments technique we saw earlier.
def get_area_and_perimeter(length, width):
    """Return area and perimeter of a rectangle"""
    area = length * width
    perimeter = 2 * (length + width)

    return area, perimeter


area, perimeter = get_area_and_perimeter(3, 7)
print(f"Area: {area} and Perimeter: {perimeter}")
Best Practice
Don't use more than two return values as that would make the code hard to read. In case you want to return more than two values, use a complex type, such as a dictionary or list.
Modifying Arguments in a Function
A function can modify the arguments it receives from the caller by changing their values. However, whether or not that change gets reflected to outside of the function, depends on a very important concept in Python: Mutability!
If a type is mutable, then any change happening inside a function will get reflect to the outside too. If a type is immutable, the change only stays inside the function.
Mutable vs Immutable Types
Immutable Types:
- Numbers
- Strings
- Booleans
- Tuples
Mutable Types:
- Lists
- Sets
- Dictionaries
TRY IT YOURSELF:
Try the following programs and explain the output:
def change_me(param):
    param[1] = 5
    param.pop()

my_list = [1, 2, 3]
print(my_list)
change_me(my_list)
print(my_list)

my_list = [1, 2, 3]
change_me(my_list[:])
print(my_list)
TRY IT YOURSELF:
Try the following programs and explain the output:
def change_me(param):
    param[1] = 5

my_list = (1, 2, 3)
print(my_list)
change_me(my_list)
print(my_list)
TRY IT YOURSELF:
Try the following programs and explain the output:
def change_me(param):
    param = 5

number = 10
print(number)
change_me(number)
print(number)
Storing Functions in Modules
You can store your functions in a separate file called a module and then import that module into your main program.
This helps mainly in two ways:
- Cleaner programs
- Reusability
An import statement tells Python to make the code in a module available in the currently running program file.
Creating a Module
A module is just a Python file. Simply create a file with the .py extension and define a number of functions there. For example:
In math_utils.py:
def average(*numbers):
    """Returns the integer average of an arbitrary number of numbers"""
    total = sum(numbers)
    length = len(numbers)

    return total // length
Importing a Module (method 1)
You can import (copy) an entire module using import <filename>. For example, to import the module we just created, we can use import math_utils in another Python file to import the whole module (all its functions):
import math_utils

print(math_utils.average(1, 3, 4, 5))
Since we're importing the entire module, we need to specify which function we'd like to use by using the module name, followed by a ., followed by the function name.
Importing a Module (method 2)
We can also import specific functions from a module with the following syntax:
from math_utils import average

print(average(1, 3, 4, 5))
Since we imported a specific function, we don't need to use the . syntax anymore.
Importing a Module (method 2) Gotcha
Importing specific functions may cause conflicts if the main program also has functions with the same names.
Try this:
from math_utils import average

def average():
    print("hello world!")

print(average(1, 3, 4, 5))
Use as to Avoid Conflicts
In case you have conflicts with functions from another module, you can either use the first method of importing, or the second method with the as keyword to give the functions an alias (different name) to avoid conflicts.
from math_utils import average as avg

def average():
    print("hello world!")

print(avg(1, 3, 4, 5))
Importing a Module (method 3)
You can also import ALL the functions in a module using the following syntax:
from math_utils import *

print(average(1, 3, 4, 5))
Best Practice: it's best not to use this approach when you’re working with larger modules that you didn't write: if the module has a function name that matches an existing name in your project, you can get unexpected results.
User Inputs
There are times when you want to get some data from the end user of your application, such as their username or password. Python provides the input() function to help with such situations.
input() Function
The input() function pauses your program and waits for the user to enter some text. Once Python receives the user's input, it can assign it to a variable to make it convenient for you to work with:
color = input("What's your favourite colour?")
print(f"Your favourite color is {color}.")
The input() function takes only one argument which is the prompt you want to display to the user. It waits until the user presses ENTER.
TRY IT YOURSELF
How can you use a multiline prompt like the following for the input() function?
Who would cross the Bridge of Death must answer me these questions three, ere the other side he see.

What... is your name?
Type of Inputs
Whenever we use the input() function in Python, what we receive from the user is always a string, regardless of what the user provides. In case we need to get a number from the user, such as their age, we need to make sure to cast the value into a number before using it.
Try the following:
age = input("How old are you?")
if age < 13:
    print("You must be at least 13 to use the application")
Casting Inputs
The previous code snippet will generate an error as you can't compare a number (13) to a string (age) in Python. In order to fix it:
age = input("How old are you?")
age = int(age)
if age < 13:
    print("You must be at least 13 to use the application")
while Loops
So far, we've seen how to use the Python for loop to go over a list or dictionary of items, or a range of numbers. The for loop takes a collection of items and executes a block of code once for each item in the collection. In contrast, the while loop runs as long as, or while, a certain condition is true.
counter = 1
while counter < 5:
    print(counter)
    counter += 1
What's the output?
while Loop and Inputs
Why are we talking about the while loop right after our discussion on the input() function? Because more often that not, you want to keep asking the user for information until they decide to end it (think of a chat bot).
prompt = "How can I help you?"
message = ""
while message != "exit":
    message = input(prompt)
    print(message)
    # do something here with the prompt
Infinite Loops
Infinite loops (or endless loops) are one the scariest things in programming. They run forever and don't let the program to progress to the next part; hence, the program gets stuck in one place. Consider the following code:
while True:
    message = input("How can I help you?")
    print(message)

# anything below is unreachable
print("out of the loop")
# rest of the program
Using break to Exit a Loop
In the previous example, we used the conditional test in the first line to exit the loop. Python (and all other popular programming languages) allows you to exit out of a loop at any time using the break keyword.
Let's fix the previous code:
while True:
    message = input("How can I help you?")
    if message == "exit":
        break
    print(message)

# anything below is unreachable
print("out of the loop")
# rest of the program
Using while Loop with Complex Data Types
You can use the while loop with lists and dictionaries as well.
movies = ["Interstellar", "V for Vendetta", "Kill Bill"]

while movies:
    this_movie = movies.pop(0)
    print(f"I'd like to watch {this_movie}.")
Best Practice
Avoid using the while loop if you can perform the same task with the for loop. while loops are more error-prone and harder to test. Consider the following code:
movies = ["Interstellar", "V for Vendetta", "Kill Bill"]

while movies:
    this_movie = movies[0]
    print(f"I'd like to watch {this_movie}.")
What's wrong with it? How can you fix it by replacing the while loop with a for loop?
TRY IT YOURSELF
- Remove all instances of TikTok from the following list with only one loop.
social_apps = ["TikTok", "Twitter", "TikTok", "Instagram", "Facebook", "TikTok"]
- Simulate the Internet Explorer browser that asks you
Do you want Internet Explorer to be your default browser?repeatedly and doesn't stop until you sayYesorShut up!.
Files
Learning a programming language is hardly complete without knowing how to handle files. Learning to work with files and save data will make your programs easier for people to use. You will be able to run your program, do some work, and then close the program and pick up where they left off.
Reading from a file is particularly useful in data analysis applications, but it's also applicable to any situation in which you want to analyze or modify information stored in a file.
Reading a File
We can read a file using the pathlib module (or library) that comes with every Python installation. Note that the file has to exist!
from pathlib import Path

path = Path("some_file.txt")
contents = path.read_text()
print(contents)
On Paths
When you pass a simple filename like some_file.txt to Path, Python looks in the directory where the file that's currently being executed (that is, your .py program file) is stored. But that's not always the case.
There are times where the file is located somewhere other than the current directory.
Relative Paths
A relative file path tells Python to look for a given location relative to the directory where the currently running program file is stored.
Relative Paths
my_project
├── my_program
│   ├── main.py
│   ├── files
│       ├── text_file.txt
├── another_file.txt
├── external_files
│   ├── yet_another_file.txt
Assuming we're running main.py, here's how we can use relative paths for the .txt files in the above structure:
text_file.txt:Path('files/text_file.txt')another_file.txt:Path('../another_file.txt')yet_another_file.txt:Path('../external_files/yet_another_file.txt')
Absolute Paths
You can also tell Python exactly where the file is on your computer, regardless of where the program that's being executed is stored. This is called an absolute file path.
We use absolute paths when a file isn't part of our project structure.
Absolute Paths
Absolute paths are usually longer than relative paths, because they start at your system's root folder (/).
/
├── home
│   ├── mkf
│       ├── .zshrc
.zshrcabsolute path:/home/mkf/.zshrc
Reading a File Line by Line
We can use the splitlines() method on a Path result to read a text file line by line:
from pathlib import Path

path = Path("frankenstein.txt")
lines = path.splitlines()
for line in lines:
    print(line)
Since splitlines() returns a list of lines, we can use a for loop to run over the lines.
File Content Type
Just like reading a user input, Python treats text file content as string. If you're reading numbers, make sure to cast them to the appropriate type (int or float) before using.
TRY IT YOURSELF
Is your birthday in Pi?
- Download 1 million digits of Pi from here and save it as a
.txtfile on your system. - Write a program that gets a birthday in the form of
DDMMYYfrom the user (using theinput()method) and checks to see if the birthday is included in Pi.
Hint: as a string is just a list of characters, you can use the in keyword to check if a substring exists in a string:
content = "best friend forever"
substring = "end"
if substring in content:
    print(f"There's '{substring}' in '{content}'")
Writing to a File
You can the same pathlib, but this time, the write_text() method to write to a file.
from pathlib import Path

path = Path('fav_movie.txt')
path.write_text("Interstellar")
If the file doesn't exist, write_text() will create the file first. Otherwise, it will erase it before writing new content in it!
TRY IT YOURSELF
-
You can write multiple lines into a file using the
write_text()method. Find out how. -
Write a program that prompts the user for their first name, last name, and date of birth, and writes each piece of data on a new line into a file named after the user's first name (e.g.
john.txt)
Exceptions
Python uses special objects called exceptions to manage errors that arise during a program's execution. Whenever an error occurs that makes Python unsure of what to do next, it creates an exception object. If you write code that handles the exception, the program will continue running. If you don't handle the exception, the program will break.
Handling Exceptions
We can handle exceptions using the try-except block. A try-except block asks Python to do something, but it also tells Python what to do if an exception is raised.
When using try-except, the program, instead of breaking and showing the tracebacks, which is bad, users will see friendly error messages that you've written.
There are many situations in which an exception may happen. We'll see a number of them in this course.
Best Practice
When writing a Python program, make sure to read the documentation on the libraries you're using and find out about the potential exceptions that may arise. Make sure you understand them and handle them gracefully in your application.
As an exercise, read the following docs on the pathlib Python module: link and list all the exceptions.
ZeroDivisionError Exception
Try the following program:
print(10/0)
Let's fix it using a try-except block:
try:
    print(10/0)
except ZeroDivisionError:
    print("You can't divide numbers by 0! Did you skip math class in high school?")
FileNotFoundError Exception
If you try to read a file that doesn't exist, you'll get an exception. You can handle the situation with a try-except block.
from pathlib import Path

file_name = input("What file do you want me to read? ")
path = Path(file_name)
try:
    contents = path.read_text()
except FileNotFoundError:
    print("Sorry! The file doesn't seem to exist!")
else Block
You can have a third block besides try and except to handle the situation when no exception occurs:
from pathlib import Path

file_name = input("What file do you want me to read? ")
path = Path(file_name)
try:
    contents = path.read_text()
except FileNotFoundError:
    print("Sorry! The file doesn't seem to exist!")
else:
    print(contents)
Best Practice
The only code that should go in a try block is code that might cause an exception to be raised. Sometimes you'll have additional code that should run only if the try block was successful; this code goes in the else block. The except block tells Python what to do in case a certain exception arises when it tries to run the code in the try block.
Catch All Exceptions
You can catch any exception that may arise in a situation with the Exception type, which is the parent of all Exceptions.
try:
    print(10/0)
except Exception:
    print("You can't divide numbers by 0! Did you skip math class in high school?")
Best Practice
- Don't catch
Exceptionas it doesn't show the type of errors that may happen in the code. Using specific Exceptions such asZeroDivisionErrorandFileNotFoundErrorare more readable. - Minimize the amount of code in a
try-exceptblock. The larger the body of thetry, the more likely that an exception will be raised by a line of code that you didn’t expect to raise an exception. In those cases, thetry-exceptblock hides a real error. - Use
elseclause to continue the program following a successfultry. - Use the
finallyclause to execute code whether or not an exception is raised in the try block. This is often useful for cleanups, like closing a database connection.
Structured Data
Structured data is data that has a standardized format for efficient access by software and humans alike. Depending on the standard, a standard may be more readable for a machine or a human being.
Examples of structured data:
- CSV (Comma-Separated Values); more readable for machines. e.g.:
name,age,occupation Ross Geller,32,Teacher - XML (Extensible Markup Language); more readable for humans. e.g.:
<person>
    <name>Ross Geller</name>
    <age>32</age>
    <occupation>Teacher</occupation>
</person>
JSON
Or JavaScript Object Notation is another standard for storing and interchanging data that is kind of in the middle in terms of readability. That is, it's readable for humans to understand and for machines to parse and generate.
JSON is built on two structures:
- A collection of name/value pairs (think Python Dictionary)
- An ordered list of values (think Python List)
Values in JSON
Values in JSON can be one of the following types:
string. e.g. "Pam Beesly"number. e.g. 5 or 10.6object(think Python Dictionary)array(think Python List)truefalsenull
Keys are always string. i.e. in quotes.
JSON Example
{
    "name": "Ross Geller",
    "age": 32,
    "occupation": "Teacher",
    "good_at": ["Pivoting", "Science", "Divorce"],
    "is_on_a_break": true,
    "children": {
        "Ben": {"age": 8, "mother": "Carol"},
        "Emma": {"age": 1, "mother": "Rachel"}
    },
    "currently_married_to": null,
}
Whitespace in JSON
Whitespace is ignored in JSON and doesn't matter. The followings are the same as far as a machine is concerned, but one is obviously more readable for humans.
{"name":"Ross Geller","age":32,"occupation":"Teacher"}
{
    "name": "Ross Geller",
    "age": 32,
    "occupation": "Teacher"
}
Use this website to beautify/uglify JSON documents.
Programming with JSON
JSON is the most popular standard for storing and interchanging data between machines. As such all major programming languages (such as Python) come with built-in support for generating/parsing JSON documents.
Python & JSON
Python has a built-in module (library) to work with JSON named json. We start by importing the module using import json first.
There are two main method for parsing (or reading) and generating (or writing) JSON documents:
json.loads()for parsing JSON documentsjson.dumps()for generating JSON documents
Reading Example
import json

document = '{"name":"Ross Geller","age":32,"occupation":"Teacher"}'

# this will convert the document into a Python dictionary
person = json.loads(document)

print(person["name"])
print(person["age"])
print(person["occupation"])
Reading Example
import json

document = '["Carol", "Emily", "Rachel"]'

# this will convert the document into a Python list
the_gellers = json.loads(document)

for wife in the_gellers:
    print(f"Ross has been married to {wife}.")
TRY IT YOURSELF
What happens when you try to parse (or load) invalid JSON? How can you fix it?
document = '["Carol", "Emily", "Rachel"'

# this will convert the document into a Python list
the_gellers = json.loads(document)

for wife in the_gellers:
    print(f"Ross has been married to {wife}.")
Writing Example
You normally want to turn either a Python list or dictionary into JSON (although you can turn other Python types too, but that's not common as it doesn't really make sense).
import json
person = {
    "name": "Ross Geller",
    "age": 32,
    "occupation": "Teacher"
}

document = json.dumps(person)
print(document)
Writing Example
import json
person = {
    "name": "Ross Geller",
    "is_on_a_break": True,
    "currently_married_to": None,
}

document = json.dumps(person)
print(document)
What does True and None convert to in JSON? What happened to the trailing , at the end of the last field?
TRY IT YOURSELF
- Read a JSON document from a file and parse it in a Python program.
- Write a JSON document to a file in a Python program.
External Modules
External Modules (or libraries or packages) are modules that are not included in the Python standard library and need to be downloaded and installed first before being used.
pip
pip is the package installer for Python. You can use pip to install external modules. pip can install, reinstall, or uninstall Python packages.
pip is part of your Python installation, so if you have Python installed on your system, you should have pip as well.
To make sure, run pip --version or pip3 --version in a terminal.
pip Cheat Sheet
- Install the latest version:
pip install package-name - Install a specific version:
pip install package-name==1.2.3 - Upgrade a package to latest version:
pip install --upgrade package-name - Uninstall a package:
pip uninstall package-name - List all installed packages:
pip list - Search for a package:
pip search package-name - Updating
pipitself:python -m pip install --upgrade pip
pip install Examples
pip install requests. library for making HTTP requests.pip install tensorflow. library for machine learning stuff.pip install scipy. library for science stuff.pip install numpy. library for working with multi-dimensional arrays and matrices.pip install matplotlib. library for visualization.
Python Intermediate Topics
Object Oriented Programming, Custom Exceptions, and Best Practices.
Object Oriented Programming
Object Oriented Programming (OOP) is all about the idea of Encapsulation.
Encapsulation is a way to find related properties and behaviours in our program and create a blueprint out of them which we can use later.
Example
A scenario could be a program about managing the employees of a company. Each employee has some properties like name, age, and role. Some employees also have properties such as insurance and stock options plan.
There also some behaviours that each employee has, such as asking for a raise, PTO, or resign.
TRY IT YOURSELF
How would you go about writing this program with the knowledge you have so far? What are the limitations?
Hint: You can use Python dictionary to represent a person.
OOP Has Benefits
This is in Python, especifically, although most of them are language agnostic.
- DRY
- Enforce objects to have some properties and behaviours
- Simply working with complex data types like dictionaries and lists
- Extensible
- More readable
- Namespaces
- Inheritance
Classes
A Python class is a blueprint from which you can create instances (or objects). It contains the properties (fields) and behaviours (methods) you want your objects to have.
class ClassName:
    # define properties and methods
Best Practice: Class names should be in CapitalCase.
__init__() Method
The __init__() method in a class is for defining and initializing properties that each object will get once initialized.
class Employee:
    def __init__(self, name, age):
        self.name = name
        self.age = age
Like any other functions, class methods can accept arguments from the callers.
self
self represents the instance of a class, or the current object. Having self as the first parameter of class methods is a way to access the objects' properties
self is passed to class methods implicitly! That is, when calling class methods, we don't pass self.
Creating an Object
You can create an object off of a class by using the class name and passing the required arguments in the __init__() method.
employee_1 = Employee("Ross Geller", 30)
employee_2 = Employee("Rachel Green", 30)
Note that we're not passing anything for self. That's passed to the method by Python itself.
Properties and methods can be accessed using the dot (.) syntaxt.
print(employee_1.name)
Adding Methods
Methods are behaviours you want your objects to have. They are basically functions with the first argument being the object itself (self).
def submit_pto(self, hours):
    print(f"{self.name} is requesting PTO for {hours} hours")
You can call the function using an object of the class and the dot . syntax.
employee_1.submit_pto(8)
Inheritance
You can create a class that inherits its properties and methods from another one and has some properties or methods on its own too.
class Cat(Animal):
    # class Cat is inheriting from class Animal
TRY IT YOURSELF
Explain how OOP can offer the following benefits over the traditional (non-OOP) approach.
- DRY
- Enforce objects to have some properties and behaviours
- Simply working with complex data types like dictionaries and lists
- Extensible
- More readable
- Namespaces
- Inheritance
Testing
Testing your code is important because that's the only way you can be confident your code is going to work before merging it to one of the main branches.
Basically, with tests, you give your code a go before your end users do. This helps you find potential problems before your users experience them in production.
Types of Testing
There are different types of testing. Here are the most popular ones (there are more):
- Unit Testing
- Integration Testing
- End-to-End Testing
Unit Testing
Unit testing is a testing method focused around testing individual "units", or pieces of code.
The primary goal of unit testing is to make sure that a piece of code does what it’s supposed to.
The piece of code under test is usually a function.
We'll be talking about this type of testing in this course.
Integration Testing
Integration testing is a testing method focused on testing multiple components together.
The primary goal of integration testing is to make sure different components of software work together as expected.
End-to-End Testing (E2E)
System tests, or end-to-end (E2E) tests, are focused on vetting the behavior of a system from end-to-end.
The primary goal of end-to-end testing is to ensure the entire application or system as a whole behaves how we expect it to.
pytest
There are a number of third-party packages to unit test your Python code, including pytest, unittest, and testify. However, pytest is the most popular one and is the library we're going to use in this course.
pytest is not part of the Python standard library and needs to be installed before used. You can install it using pip install pytest.
Test Files
We write our unit tests in separate files. pytest requires the name of the test files to start with test_. Otherwise, it won't pick them up as files containing unit tests.
Unit Tests
Unit tests go into test files (files starting with test_). Unit tests are Python functions testing a piece of code (usually functions) in application code.
pytest requires the name of the unit test functions to start with test_. Otherwise, it won't run them.
Example of a Test File
Assuming we have a function named add(a, b) in a file named main.py, here's a test file to perform unit testing:
test_main.py
from main import add

def test_add():
    a, b = 5, 10
    result = add(a, b)
    assert result == 15
assert
We use assertions to verify the logic of the piece of code we're testing. An assertion is a claim about a condition. We use the assert keyword to make an assertion.
Example: by assert result = 15 we're claiming that the value of result should be 15. If it's not, then the assertion is not correct and the unit test fails.
Commonly Used Assertions
| Assertion | Claim |
|---|---|
assert a == b | Assert that two values are equal. |
assert a != b | Assert that two values are not equal. |
assert a | Assert that a is True |
assert not a | Assert that a is False |
assert item in list | Assert that item is in a list |
assert item not in list | Assert that item is not in a list |
Running Tests
Once we have our test files and unit tests, we can run them using the pytest command. pytest will search the current directory (and its subdirectories) for files starting with test_. Then it will search for functions starting with test_ inside the files and run them.
pytest Cheat Sheet
pytest: will runpytest.pytest -k "substring": will only run tests that containsubstringin their names.pytest -s: will show program outputs such asprints.pytest -l: will show the value of local variables in case of an exception.pytest -v: will show verbose results (results with more information).
Linting
Linting your code has a number benefits:
- Helps identify errors
- Enforces coding standards
- Improves code quality by suggesting best practices
Python Linters
There are several third-party linters that you can use for linting your Python code. Here are a few:
pylintpytypeRuff
PyLint is the most popular one.
Using pylint
Like pytest, pylint is an external library that doesn't come with the Python standard library; hence, you need to install it first: pip install pylint.
Running pylint
You can run pylint using the pylint directory-name command. This will run pylint on all the Python files in tha directory.
Formatting Your Code
Although Python has an implicit formatting style (using indentation), there are still different ways to write Python code. Here's one example:
# one way
person = {"first_name": "Steve", "last_name": "Jobs", "is_alive": False}
# another way
person = {
    "first_name": "Steve",
    "last_name": "Jobs",
    "is_alive": False
    }
Using a Formatter
When working in a team, using a formatter helps a lot. Without a formatter, each developer could have a different coding style, which makes reviewing and reading each other's code difficult. Therefore, developers working on the same project are recommended to use a formatter to avoid such difficulties.
Python Formatters
There are several third-party formatters for Python. Here are a few:
blackisortautopep8
black is the most popular one. Current companies use black: Facebook, Dropbox, Lyft, Mozilla, Quora, Duolingo, Tesla.
Using black
Black is a third-party library that doesn't come with Python pre-installed. So, we need to install it first: pip install black.
Once installed, we can use the following command to format our code:
black source_file_or_directory
Using black in VSCode
You can also set black to be the default formatter of Python code in VSCode and run it each time you save your code.
Read more here.
Python Best Practices
A short list of best practices you're recommended to follow when writing Python programs.
The __name__ == "__main__" Expression
You're already familiar with Python modules (separate files with functions that you can import into other files). By using the __name__ == "__main__" you're letting the users of your modules to only run the scripts they want to and nothing else.
if __name__ == "__main__":
    # some code
Order of imports
Try to have this order for your imports:
- Standard libraries (such as
json) - Third-party libraries (such as
requests) - Your own modules (such as
math_utilthat we created earlier)
Prefer Multiple Assignment Over Indexing
Python lets you unpack complex types like lists and tuples. Unpacking should be preferred because it makes code more readable.
area_perimeter = [16, 15]

# bad
area = area_perimeter[0]
perimeter = area_perimeter[1]

# good
area, perimeter = area_perimeter
Prefer enumerate over range in Loops
When you have a list of items, you can loop through the list and get each item plus the index of the item using range:
my_list = ["Calgary", "Toronto", "Edmonton"]
for idx in range(len(my_list)):
    print(f"city number {idx} is {my_list[idx]}")
You can achieve the same thing with enumerate which gives you the next item and the index.
my_list = ["Calgary", "Toronto", "Edmonton"]
for idx, city in enumerate(my_list):
    print(f"city number {idx} is {city}")
Use zip to Iterate Multiple Lists in Parallel
Sometimes, you have separate lists and want to loop over them at the same time and access items from both.
provinces = ["Alberta", "Ontario", "British Columbia"]
capitals = ["Edmonton", "Toronto", "Victoria"]

for province, capital in zip(provinces, capitals):
    print(f"The capital of {provice} is {capital}.")
Gotcha: it only goes as far as the smallest list! Look at itertools.zip_longest().
Know How to Use Assignment Expression :=
Assignment Expression (:=) is a new syntax introduced in Python 3.8. The expression is most useful for doing an assignment and perform a conditional test check at the same time:
cities = ["Calgary", "Edmonton"]
# bad
first_city = cities[0]
if first_city == "Calgary":
    # do stuff

# better
if (first_city := cities[0]) == "Calgary":
    # do stuff
Use Catch-all Expression Over Slicing
You can divide a list to different sections using slicing:
cities = ["Calgary", "Edmonton", "Victoria", "Vancouver", "Waterloo", "Montreal"]
most_important = cities[0]
second_important = cities[1]
the_rest = cities[2:]
Thats is verbose and hard to read. You can use unpacking and catch-all expression (*) instead.
cities = ["Calgary", "Edmonton", "Victoria", "Vancouver", "Waterloo", "Montreal"]
most_important, second_important, *the_rest = cities
Remember Functions Are First-class Citizens
Functions in Python are first-class citizens, meaning that you can do almost everything with them as you can with variables: assing them into variables, pass them into another functions, return by a function, stores in lists, etc.
def control_unit(fn, **kwargs):
    return fn(**kwargs)

def add(a, b):
    return a + b
def subtract(a,b):
    return a - b

print(control_unit(add, a=5, b=10))
print(control_unit(subtract, a=5, b=10))
Use lambda For One-line One-time Functions
There are times that you need to pass a function as an argument to another function, but that's it! You're not going to use that function anywhere else. Python's lambda enables you to do that.
print(control_unit(lambda a,b:a+b, a=5, b=10))
Sort Based on Custom Criteria Using the key Parameter
You can use the sort or sorted with list of items that have a natural order (e.g. numbers, strings). But what about objects of a class?
class Person:
    # has 'name' and 'age' properties
person_1 = Person("Alice", 28)
person_2 = Person("John", 30)
people = [person_1, person_2]
people.sort()
# sort based on age
people.sort(key=lambda x:x.age)
Use get() to Look for a Key in a Dictionary
Using the dictionary_name["key"] to get a key from a dictionary has the potential of raising a KeyError exception, which you should handle to make sure your program doesn't crash.
Use get() instead as it doesn't raise any exceptions. You're also able to provide a default value as the second argument.
my_dict = {"name": "Ross"}
age = my_dict["age"] # exception!

age = my_dict.get("age") # returns None but no exception
age = my_dict.get("age", 0) # returns 0
Raise Exception Instead of Printing Errors
When a function runs into a situation where it can't perform properly, it's always a good idea to raise an exception and let the caller know about it, other than simply printing out or returning a message as that'd be hard to decode.
# bad
def set_age(self, age):
    if age < 0:
        return "invalid age"
    self.age = age
    return "OK"

# better
def set_age(self, age):
    if age < 0:
        raise ValueError("invalid age")
    self.age = age
Know Python's Built-in Exceptions
You can see the exceptions that come with the Python library here.
The popular and generic ones:
ValueErrorKeyErrorException
Create Custom Exception to Improve Readability
If you need to raise an exception that doesn't come with Python, you can create a new one with a descriptive name by creating a class that inherits from the Exception class:
# bad
def get_record(record_id):
    # ...
    raise ValueError("record doesn't exist")

# good
class RecordNotExist(Exception):
    pass

def get_record(record_id):
    # ...
    raise RecordNotExist(f"record {record_id} doesn't exist")
Use Enums When You Need Distinct Options Regardless of Values
Sometimes all you want is a list of distinct things. For example, you want to mark a process as COMPLETED, IN_PROGRESS, or STOPPED. As long as you can distinguish between the three states, you're good. You don't care about the values.
In cases like this, you can use inherit from the Enum class and create distinct options:
from enum import Enum
class Status(Enum):
    COMPLETED = 1
    IN_PROGRESS = "banana"
    STOPPED = False

process.status = Staus.STOPPED
Write Docstrings for Every Function, Class, and Module
You should always provide documentation about your code, whether that's a function, class, or a module.
We add docstrings using the """.
- For modules: that goes to the first line of the file
- For functions (and methods): the first line after the function definition.
- For classes: the first line after the class definition.
Follow Docstring Patterns
There are certain patterns that Python developers use when it comes to docstrings. Here's an example for a function:
def find_anagrams(word, dictionary):
    """Finds all anagrams for a word.

    Args:
        word: String of the target word.
        dictionary: dictionary of words as keys and definitions as values.

    Returns:
        List of anagrams that were found. Empty if
        none were found.

    Raises:
        ValueError if word is not a string.
    """
Check Documentation with pydoc
You can see run a server that shows all the Python documentation, plus your own using the pydoc library.
pydoc -p 3337
Comprehension
There's a shorter syntax in Python when you want to create a list, dictionary, or tuple based on the values of an existing list, dictionary, tuple, etc.
numbers = [1,2,3,4]
squared = []
for number in numbers:
    squared.append(number**2)
print(squared) # [1, 4, 9, 16]

# better
squared = [number**2 for number in numbers]
print(squared) # [1, 4, 9, 16]
List Comprehension
When you want to create a new list based on the values of an iterable.
Syntax:
new_list = [expression for item in iterable if condition == True]
Example:
numbers = [1,2,3,4]
even_squared = [number**2 for number in numbers if number % 2 == 0]
print(squared) # [4, 16]
Dictionary Comprehension
When you want to create a new dictionary based on keys and values of an iterable.
Syntax
new_dict = [expression for item in iterable if condition == True]
Example:
names = ["Ross", "Chandler", "Rachel", "Monica"]
people = {f"person_{idx}": person for idx, person in enumerate(names, 1)}
print(people)
# {'person_1': 'Ross', 'person_2': 'Chandler', 'person_3': 'Rachel', 'person_4': 'Monica'}
Testing & Linting
Always write unit tests for your code and use a linter to check for potential errors and areas of improvements.
Containerization
Containerization is a software deployment process that bundles an application’s code with all the files and libraries it needs to run on any infrastructure. Traditionally, to run any application on your computer, you had to install the version that matched your machine’s operating system. For example, you needed to install the Windows version of a software package on a Windows machine. However, with containerization, you can create a single software package, or container, that runs on all types of devices and operating systems. From AWS
Docker
Docker is a technology (not the only one) that enables you to package and run your applications in entities called Containers.
Image vs Container
The key difference between a Docker image vs. a container is that a Docker image is a read-only immutable template that defines how a container will be created. A Docker container is a runtime instance of a Docker image that gets created when the docker run command is implemented.
For instance, let's run a container based on an official Ubuntu image:
docker run -it ubuntu bash
The above command will pull the Ubuntu image (if not available on your system already) and run the bash command inside it. Now, you have a container from the image to play around with. The -it tag gives you an interactive shell so you can put your commands in. i for interactive and t for terminal.
Note that you can use public images from the community (anyone can build one and we're going to do same later in the course). To see the available public images, head to Docker Hub.
Exercise: Run a container with an interactive shell and create a file. Then, create another container based on the same image and see if the file exists. Spoiler alert: it won't!
Creating a new image from a container
Although images are immutable, it is possible to make changes to a running container with the commit command and then create a new image out of it. The process is the opposite of run. With run, you turn an image to a container; with commit, you turn a container to an image.
docker commit <container-id> <repo>:<tag>
Docker main process
A container’s main running process is the ENTRYPOINT and/or CMD at the end of the Dockerfile. It is generally recommended that you separate areas of concern by using one service per container. That service may fork into multiple processes (for example, Apache web server starts multiple worker processes). When this process exists, the container exists as well.
For some images, such as Ubuntu, we can replace the main process by providing a command at the end of the docker run command.
Running containers in the background
By default, docker run will start the container in the foreground, which means that you will lose the current shell. In order to start a container in the background to get your shell back, use the -d flag short for detached.
docker run --rm -d ubuntu echo "hi"
Checking the logs of a container
As long as the container is still around (you didn't start it with the --rm flag and you didn't remove it afterwards), you can check its logs even if the container has stopped. You can use the docker logs command for that.
docker logs <container-id/container-name>
Killing and removing a container
You can kill a running container using docker kill command and then remove a stopped container using the docker rm command. Note that if you remove a stopped container, you won't have access to its logs anymore.
docker kill <container-id/container-name>
docker rm <container-id/container-name>
Checking resources used by a container
You can see the amount of CPU and Memory that a container is using while running, using the docker stats command. It's useful to use this command to understand the requirements of your application before shipping it in production.
docker stats <container-id/container-name>
Package your code with all the dependencies
As discussed earlier in the class, the docker image of your application must include your application code, plus all the dependencies. These dependecies usually fall under configuration files and libraries necessary for your code to run.
When dockerizing your Go code, you don't need to worry about your dependencies, as the Go build process makes sure that all the dependencies are included in the image. However--as we've seen this before for packaging your Python Lambda code--if your application is in Python, you need to go to some extra step to make sure your dependencies are also included in the image.
This step is in fact no different than packagin your Python code for a Lambda function as we had to do the same there as well. One difference between including your dependencies for a docker image and a Lambda function is the boto3 library--the AWS SDK library for Python. For a Lambda function, this library is already included in the runtime, so you won't need to package it with the rest of your function (although you still could). For a docker image, however, you can only be sure of one thing: that the host machine running your image has docker already installed. No other assumption should be made about the host. Therefore, if you're using boto3, include it in your docker image as it won't be present in runtime, even when you're running in on AWS.
Dockerizing a Python application with dependencies
As mentioned before, a good practice when writing Python code (whether it's for a microservice and or a Lambda function or a batch job), is to include all the external libraries (libraries not included in the Python language by default) in a file named requirements.txt in the root of your project (this is usually where your Dockerfile will be included too).
Here's an example we saw before. A simple Python code retrieving the public IP address of the machine it's running on.
main.py
import requests

def handler(event, context):
    response = get_url("http://checkip.amazonaws.com")
    print("My IP is:", response.text)


def get_url(url):
    try:
        response = requests.get(url)
    except:
        response = None

    return response

handler(None, None)
The requests library is not included in the Python language by default. Hence, we include it in a requirements.txt file to be installed later by pip (Python package manager).
requirements.txt
requests
And here's the Dockerfile we can use to build the image:
Dockerfile
FROM python:alpine

# adding a maintainer to the image
# this only helps with documentation
LABEL maintainer="mkf@mkf.com"

COPY . .

RUN pip install -r requirements.txt

ENTRYPOINT [ "python", "main.py" ]
Build the image with:
docker build -t get-ip .
Run a container from the image with:
docker run --rm --name ip get-ip
Passing environment variables to a container
As discussed in a previous lecture, application configurations should be passed using environment variables. You can pass environment variables to a container using the --env (or -e for short) flag.
Here's a simple Python program that reads from the environment variable NAME to greet the user. If the environment variable doesn't exist, it will use stranger instead.
main.py
import os

def main():
    # reading the NAME environment variable
    # if it doesn't exist, we will use "stranger" as default
    name = os.getenv("NAME", "stranger")
    print(f"Hello, {name}!")

if __name__ == "__main__":
    main()
And here's the Dockerfile for building the image:
Dockerfile
FROM python:alpine

LABEL maintainer="mkf@mkf.com"

COPY . .

ENV NAME=Batman

ENTRYPOINT [ "python", "main.py" ]
Build the image using:
docker build -t env-test .
The ENV directive in the file declares an environment variable named NAME. If this environment variable is not passed when running the container, its values will be used by the container. If passed, however, the value (BATMAN) will be replaced by the new value. Try out these scenarios:
- No environment variable is passed
docker run --rm env-test
- Pass an environment variable using the
--envflag
docker run --rm --env NAME=Alice env-test
- Pass an environment variable using the shorthand
-eflag
docker run --rm -e NAME=John env-test
Passing multiple environment variables at once
You can use the --env or -e flag multiple times to pass multiple environment variables at once when starting a container:
docker run --rm -e NAME=Alice -e JOB=Engineer env-test
Although this approach works, sometimes you need an easier way and a shorter command to run your containers. You can do so by having all your environment variables in a file and pass the file to your container with the --env-file flag.
We're going to use the sampe Python code as used above. For the Dockerfile, we are using a similar one as shown bellow:
Dockerfile
FROM python:alpine

LABEL maintainer="mkf@mkf.com"

COPY . .

CMD [ "python", "main.py" ]
The Dockefile is almost the same, except we're not defining any default values for environment variables, and we're also using the CMD directive instead of ENTRYPOINT so that we can replace it when starting a container.
Now, we define all our environment variables inside a file named .env. You can name it anything you want, but it's a convention to name them with a . so that they become hidden on a Unix system. You can also include them in the .gitignore file if you have sensitive information there in order to avoid leaking them to others.
.env
NAME=Alice
JOB=Engineer
COLLEGE=Bow Valley
This is a simple key/value file. Let's build the image using:
docker build -t env-file .
Now, we start a container from the image and pass the file as environment variables using the --env-file flag:
docker run --rm --env-file=.env env-file env
The last argument (env) replaces the default CMD in the image, causes the container to show all the environment variables included in the image. You should be able to find all the three environment variables in the file there. Note that you will also find other environment variables set by the base image.
Mounting a volume inside a container
We can mount a volume (such as a folder) inside the container so it can access it's contents. This is a way for the container to access the files on the host machine when it starts.
Let's write a Python program to read the contents of a file in the volume directory. You can name the directory anything you want, but make sure the directory exists (we're going to create it during the build process).
main.py
def main():
    with open("volume/test", "r") as f:
        print(f.read())

if __name__ == "__main__":
    main()
And here's the Dockerfile:
Dockerfile
FROM python:alpine

LABEL maintainer="mkf@mkf.com"

# setting the working directory to /app
# the command will create the directory if not exist
WORKDIR /app

# creating a directory name volume so
# we can use later to mount a folder on the
# host machine into
RUN mkdir volume

COPY . .

CMD [ "python", "main.py" ]
Build the image with:
docker build -t volume-test .
Let's create a directory on the host machine and put a file in there (the name of the folder and file could be anything):
mkdir $HOME/docker-vo
echo "sample text" > $HOME/docker-vo/test
Now, we start a container and mount the folder on the host to a folder on the container with the help of the -v flag:
docker run --rm -v $HOME/docker-vo:/app/volume volume-test
The application in the container should be able to read the file from the host machine and outputs:
sample text
Passing AWS credentials to a container
Although you can mount the .aws directory on your host on to the container, that is not a best practice. For one thing, if you have set up profiles, you would need to specify the profile name in your application code running inside the container. As we discussed in the class before, this is not a good practice because your code would rely on a profile that won't exist in the cloud (we use a different way to attach policies to containers in the cloud and no profile exists there). As credentials are a form of configuration, your application can read them via environment variables. This way, you won't need to change your code in order to run in different environment. This a best practice.
You can use aws-vault to pass the credentials as environment variables to a container. Let's write a Python application that lists all S3 buckets in an account:
main.py
import boto3

# Retrieve the list of existing buckets
s3 = boto3.client('s3')
response = s3.list_buckets()

# Output the bucket names
print('Existing buckets:')
for bucket in response['Buckets']:
    print(f'  {bucket["Name"]}')
Don't forget to add the boto3 library to the requirements.txt file:
requirements.txt
boto3
Now the Dockerfile:
Dockerfile
FROM python:alpine

LABEL maintainer="mkf@mkf.com"

COPY . .

RUN pip install -r requirements.txt

CMD [ "python", "main.py" ]
Build the image with:
docker build -t aws-test .
We then use aws-vault to pass the necessary credentials using environment variables. One thing to note here is that aws-vault uses temporary credentials. Therefore, we need to pass two more environment variables (besides AWS_SECRET_ACCESS_KEY and AWS_ACCESS_KEY_ID): AWS_SESSION_TOKEN and AWS_SECURITY_TOKEN.
Let's run a test before running the application to see if the environment variables are being passed correctly. Note that if you're reading an environment variable from the host and passing it as an environment variable with the same name to the container, you don't need to specify both key and value. You can just use -e ENV_NAME when starting a container.
aws-vault exec <YOUR-AWS-VAULE-PROFILE> -- docker run -e AWS_ACCESS_KEY_ID -e AWS_SECRET_ACCESS_KEY -e AWS_SESSION_TOKEN -e AWS_SECURITY_TOKEN --rm aws-test env | grep AWS
This command should show you all the environment variables getting passed from aws-vault. If you see them listed, you're good to run the container:
aws-vault exec <YOUR-AWS-VAULE-PROFILE> -- docker run -e AWS_ACCESS_KEY_ID -e AWS_SECRET_ACCESS_KEY -e AWS_SESSION_TOKEN -e AWS_SECURITY_TOKEN --rm aws-test
You should be able to see the list of S3 buckets you have in your account.
Dokcer CLI Cheat Sheet
You can find the official cheat sheet here.
More commands:
docker build --platform <platform> -t <tag> .: building a docker image for multiple platforms (architectures). Read more here.docker system prune: to get rid of unused images/containers.docker run --cpus="1" --memory="1g" <image-name>: to limit the resources (cpu and memory) that a container can use.
Dockerfile Cheat Sheet
Here's one good resource on Dockerfile directives.
Example Website Using Docker
Here's a sample website with a Dockerfile included. See the instructions on how to build and run it.
AWS Dockerrun JSON file
AWS Beanstalk requires a file named Dockerrun.aws.json to deploy an application from Docker Hub. Here's what the file should contain (minimum):
{
  "AWSEBDockerrunVersion": "1",
  "Image": {
    "Name": "IMAGE_ADDRESS",
    "Update": "true"
  },
  "Ports": [
    {
      "ContainerPort": "PORT"
    }
  ]
}
What is CI/CD?
CI: Continuous integration is the practice of automating the integration of code changes from multiple contributors into a single software project. It’s a primary DevOps best practice, allowing developers to frequently merge code changes into a central repository where builds and tests then run. Automated tools are used to assert the new code’s correctness before integration. (source)
CD: Continuous deployment is a strategy for software releases wherein any code commit that passes the automated testing phase is automatically released into the production environment, making changes that are visible to the software's users. (source)
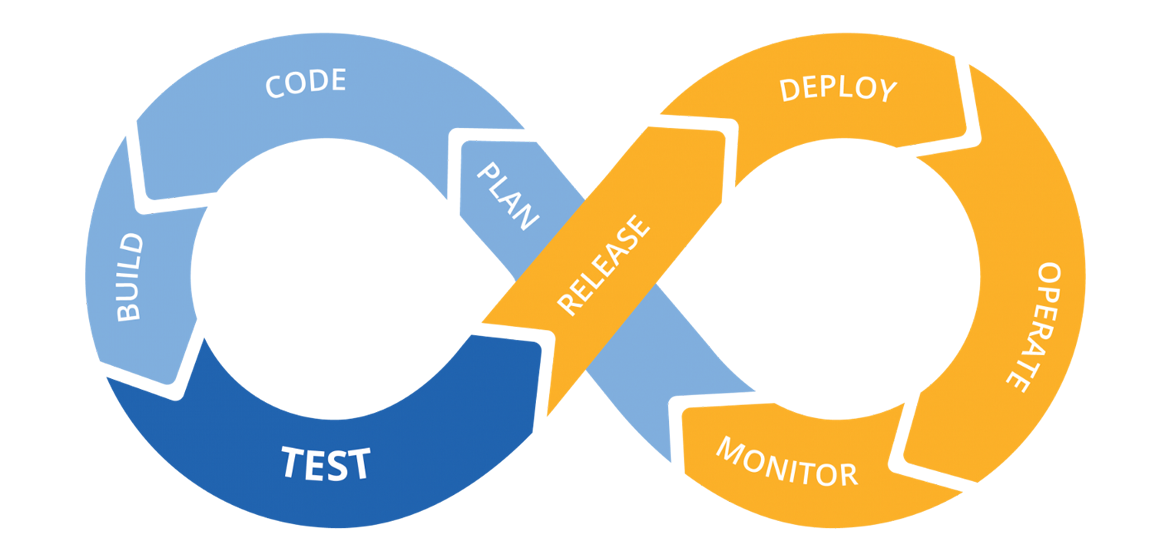
GitHub Actions
GitHub actions allow you to automate your software development and delivery process right from the place you store your code. It lets you Build, Test, and Deploy your applications. It has a generous free-tier that you most likely won't cross. So, it's free and powerful.
GitHub actions can help you automate different phases of software development and delivery. As mentioned above, theres phases usually include Build, Test, and Deploy.
GitHub Actions have 4 main sections:
- Event (such as Push and Pull Requests)
- Job (a series of steps with a shared purpose)
- Steps (phases of a job that need to happen one after another)
- Actions/Command (code or commands that need to be executed in a particular step)
GitHub actions must be inside your repo, under this folder: .github/workflows. Each job runs on a separate machine that GitHub calls a Runner. You can find the list of available runners + the software installed on them here.
GitHub Action to make sure Python code is formatted
Python doesn't have an official formatter, so here we're using a popular one named black (it doesn't matter really. you can choose something else). In this action, we want to maker sure that anyone who makes a Pull Request (PR), has already formatted their code with black. If not, the action will fail and let us know that the PR should not be merged:
# any name you want for the action
name: automation

# which events trigger this action
# here we're saying pull requests to the `main` branch only
on:
  pull_request:
    branches:
      - main

# you can have one or more jobs
jobs:
    # job name
  format:
    # an instance to run the job on
    runs-on: ubuntu-latest
    # steps start here
    steps:
    # this step uses an action from the community to checkout the repo
    # it will download the repo on the instance running the job
      - name: GitHub checkout
        uses: actions/checkout@v2

    # this step runs a command to install `black`
      - name: Install black
        run: pip install black==22.*

    # finally, this step checks to see if all the files
    # are properly formatted
      - name: Run black
        run: black . --check
You can put the above workflow with any name under .github/workflows.
As mentioned above, GitHub Actions can have more than one job in a single workflow. Let's add another one.
GitHub Action to run Python tests
As discussed before, we can use pytest to test our Python code. Let's add another job to the workflow above to do that.
...
  test:
    runs-on: ubuntu-latest
    steps:
      - name: GitHub checkout
        uses: actions/checkout@v2

      - name: Install Pytest
        run: pip install pytest

      - name: Run Tests
        run: python -m pytest
GitHub Action to build and push Docker images to Docker Hub
We can create a GitHub action to build and then push an image into our Docker Hub account:
name: build & push

on:
  push:
    branches:
      - main
    paths-ignore:
      - '**.md'

jobs:
  run:
    runs-on: ubuntu-latest
    env:
      REPO_NAME: <your-repo-name>

    steps:
      - name: GitHub checkout
        uses: actions/checkout@v2

      - name: Docker Build
        run: docker build -t ${{ secrets.DOCKER_HUB_USER }}/${{ env.REPO_NAME }} .

      - name: Docker Push
        run: docker push ${{ secrets.DOCKER_HUB_USER }}/${{ env.REPO_NAME }}:latest
Appendix
YAML
YAML is a human-friendly data serialization language for all programming languages. It is similar to JSON, but unlike JSON, it's more human-readable, more compact, and supports comments. Read more here.
More about YAML:
- YAML files end in
.yamlor.yml - YAML is case-sensitive
- YAML is whitespace-sensitive and indentation defines the structure, but it doesn’t accept tabs for indentation
- Empty lines are ignored
- Comments are preceded by an octothorpe
#
Example of data in YAML:
data:
- name: Alice
  age: 28
  hobbies:
  - Music
  - Programming
- name: John
  age: 25
  hobbies:
  - Running
  - Reading
The JSON equivalent of the above data is as follows:
{
  "data":[
    {
      "name": "Alice",
      "age": 28,
      "hobbies": ["Music", "Programming"]
    },
    {
      "name": "John",
      "age": 25,
      "hobbies": ["Running", "Reading"]
    }
  ]
}
yq
yq A lightweight and portable command-line YAML processor.
Read the documentation on how to download and install yq.
Once you've installed yq, run yq --version in the terminal to make sure everything went fine.
Example
Assuming that you have a file stored in the current directory named test.yaml that contains the following content:
data:
- name: Alice
  age: 28
  hobbies:
  - Music
  - Programming
- name: John
  age: 25
  hobbies:
  - Running
  - Reading
You can run the following commands to query the file:
yq ".data[0].name" test.yamlto getAliceyq ".data[1].name" test.yamlto getJohnyq ".data[1].hobbies[0]" test.yamlto getRunning
You can also use yq to modify a YAML file and generate a new one (it won't replace the original file). For example, the following command will replace the first item in the hobbies array for John to Video Games:
yq ".data[1].hobbies[0] = \"Video Games\"" test.yaml
As mentioned, the output will be a new YAML:
data:
  - name: Alice
    age: 28
    hobbies:
      - Music
      - Programming
  - name: John
    age: 25
    hobbies:
      - Video Games
      - Reading
You can use the > operator in the (Unix) terminal to save the new YAML into a new file. For example, the following command will generate a new YAML and save it into a file named new.yaml:
yq ".data[1].hobbies[0] = \"Video Games\"" test.yaml > new.yaml
DigitalOcean Command Line Interface (doctl)
doctl allows you to interact with the DigitalOcean API via the command line. It supports most functionality found in the control panel.
Read the documentation on how to install and configure doctl for your operating system.
Once doctl is installed and configured, you can interact with DigitalOcean resources via the command line, which comes in handy when using GitHub Actions.
The doctl reference can be found here.
Useful Commands
doctl version: to see the version of the tool and make sure it's installed correctlydoctl auth init: to initiate the authentication processdoctl auth list: to see the list of authenticationsdoctl account get: to get the account informationdoctl apps list: to get the list of appsdoctl apps get <app-id>: to get the details of an appdoctl apps spec get <app-id>: to get the YAML specification of an appdoctl apps update <app-id> --spec spec.yaml: to update the specification of an app
Useful Flags
--wait: to wait for a command to finish--format: to filter the output of a command
CI/CD for Deploying on DigitalOcean
name: ci-cd

on:
  push:
    branches:
      - main

jobs:
  deploy:
    name: build and deploy
    runs-on: ubuntu-latest
    steps:
      - name: Checkout code
        uses: actions/checkout@v3

      - name: Docker build and Push
        run: |
          docker login -u masoudkf -p "${{ secrets.DOCKER_HUB_PASSWORD }}"
          docker build --build-arg STUDENT_NAME="Masoud" --build-arg CHARACTER_IMAGE="character.jpg" --platform linux/amd64 -t masoudkf/click-that-head:$GITHUB_SHA .
          docker push masoudkf/click-that-head:$GITHUB_SHA

      - name: DO Login
        uses: digitalocean/action-doctl@v2
        with:
          token: ${{ secrets.DIGITALOCEAN_ACCESS_TOKEN }}

      - name: DO Deploy
        run: |
          doctl apps spec get ${{ secrets.APP_ID }} > app.yaml
          yq ".services[0].image.tag = \"$GITHUB_SHA\"" app.yaml > app-new.yaml
          doctl apps update ${{ secrets.APP_ID }} --spec app-new.yaml --wait
          MSG="App was deployed.\n$(doctl apps get ${{ secrets.APP_ID }} --format DefaultIngress --no-header true)"
          curl -X POST -H 'Content-type: application/json' --data '{"text":"'"$MSG"'"}' ${{ secrets.SLACK_HOOK }}
Next Steps
We Only Scratched The Surface
Each of the topics discussed in class could be talked about for a whole semester, if not more. We only scratched the surface; hence the title Introduction to Software Development and not Software Development Deep Dive.
If you'd like to continue the journey, there are many resources you could use. I'll mention a few in each topic here.
Software Development Process
- Software Engineering at Google: Lessons Learned from Programming Over Time by Titus Winters, Tom Manshreck, and Hyrum Wright
- Code Simplicity: The Fundamentals of Software by Max Kanat-Alexander
- Understanding Software by Max Kanat-Alexander
- A Philosophy of Software Design, 2nd Edition by John Ousterhout
Coding/Testing/Best Practices
- Python Crash Course, 3rd Edition: A Hands-On, Project-Based Introduction to Programming by Eric Matthes
- Fluent Python: Clear, Concise, and Effective Programming by Luciano Ramalho
- Effective Python: 90 Specific Ways to Write Better Python by Brett Slatkin
- The Pragmatic Programmer: Your journey to mastery by David Thomas and Andrew Hunt
Version Control/Integrations
- Version Control with Git: Powerful Tools and Techniques for Collaborative Software Development by Jon Loeliger and Prem Ponuthorai
- Atlassian Git Tutorials
Algorithms/Data Stuctures/Performance Analysis
- Grokking Algorithms: An illustrated guide for programmers and other curious people by Aditya Bhargava
- A Common-Sense Guide to Data Structures and Algorithms, Second Edition: Level Up Your Core Programming Skills by Jay Wengrow
- Introduction to Algorithms, fourth edition by CLRS
Building/Containers
- Docker Deep Dive by Nigel Poulton
- Docker: Up & Running: Shipping Reliable Containers in Production by Sean Kane and Karl Matthias
- Docker Documentation
Deployment/Cloud
DevOps/Automation/CICD
- The DevOps Handbook: How to Create World-Class Agility, Reliability, & Security in Technology Organizations by Gene Kim & Jez Humble
- Learning GitHub Actions: Automation and Integration of CI/CD with GitHub by Brent Laster
- GitHub Actions Documentation
Software Architecture
- Fundamentals of Software Architecture: An Engineering Approach by Mark Richards and Neal Ford
Security
Monitoring
Linux/Unix Command Line
- The Linux Command Line, 2nd Edition: A Complete Introduction by William Shotts
- Efficient Linux at the Command Line by Daniel J. Barrett
Topics We Didn't Discuss This Time
You can find the topics we didn't talk about this semester (including front-end development) on my blog: masoudkarimif.github.io